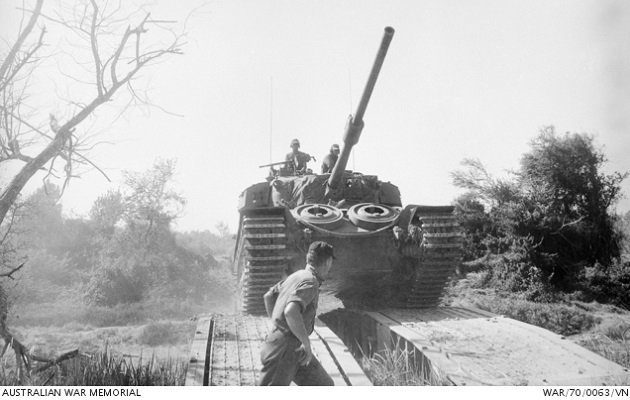
The announcement that a squadron of Centurion tanks was to reinforce the Australian forces in South Vietnam was greeted by skepticism in some quarters. Critics claimed that the mobility of the heavy tanks would be so curtailed by the rice paddies and jungle that they would eventually become static pillboxes defending the perimeter of bases. It was also argued that an enemy with modern anti-tank weapons could easily destroy the slow and cumbersome Centurions. However, such criticisms were soon to be disproved.
Australia acquired its Centurion tanks in a number of batches, direct from the factory, from British storage in Hong Kong (ten Mk 5s) or from New Zealand (eight gun tanks and one ARV Mk 2). The Centurions were assigned to the 1st Armoured Regiment (formed on 7 July 1949) and based at Puckapunyal (west of Seymour) in central Victoria, south eastern Australia.
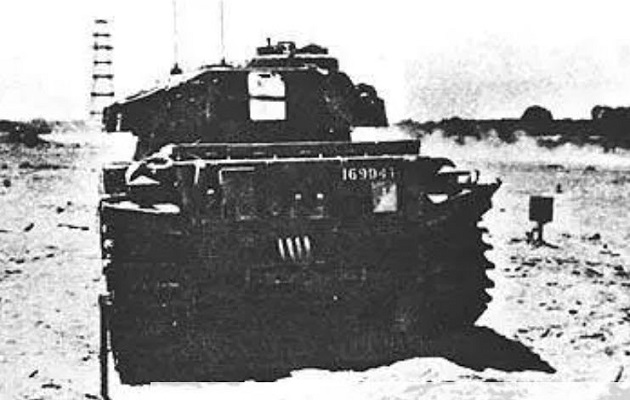
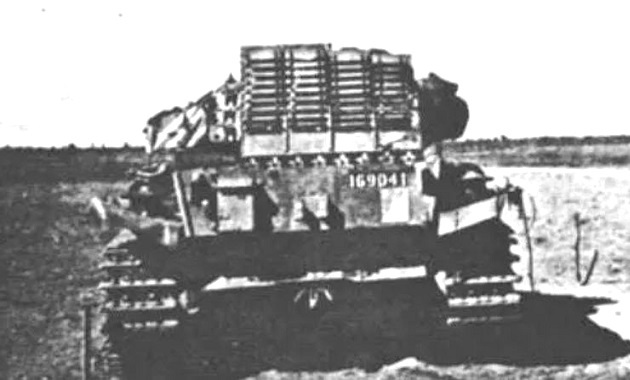
The Army Registration Number (ARN) was a 6 digit number painted in white on a black rectangle on the front and rear of each Centurion.
| Mark/Type | # | ARN Range | Delivery Years |
|---|---|---|---|
| Mark 3 | 60 | 169000 to 169059 | 1951/52 |
| Mark 5 | 51 | 169060 to 169110 | 1955/56 |
| Mark 2 ARV | 4 | 169111 to 169114 | 1955/56 |
| Mark 5 | 6 | 169115 to 169020 | 1956/57 |
| Mark 2 ARV | 2 | 169121 to 169122 | 1956/57 |
| Mark 5 Bridgelayer | 4 | 115541 to 115544 | 1960/61 |
ARV – Armoured Recovery Vehicle
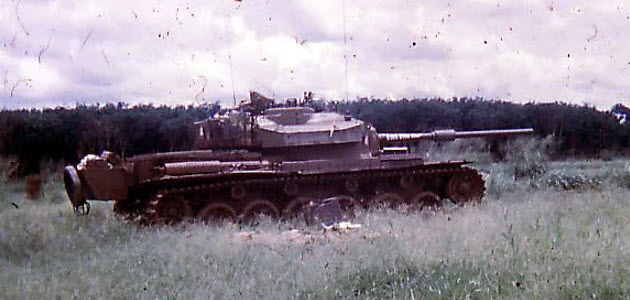
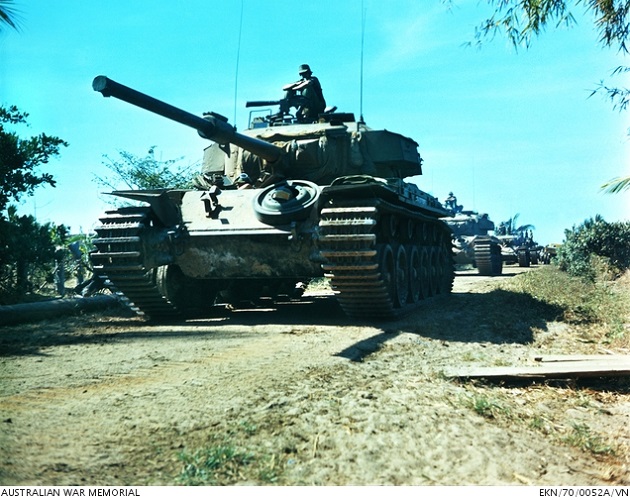
The first batch of 60 Centurion Mk.3 tanks with early Type A 20-pounder gun barrel (no fume extractor) replaced their aging WWII era Churchill tanks. In 1956, the Centurion Mk.3s were upgraded to Mk.5 standards. Later a modification program replaced the early Type A barrels with the Type B barrel which had a fume extractor. The introduction of the Type B barrel was accompanied by other modifications including the addition of a ranging machine gun (which required the additional counter weights on the fume extractor), a number 4 reflector sight/periscope within the turret and an external 100-imperial-gallon (450 L) long range fuel tank mounted on the rear hull. An infra-red (IR) illumination system was also installed for improved night vision with a rear turret bustle rack which carried the dismounted IR search light. In Vietnam, the IR search light was not employed much due to the high ambient temperatures. The unofficial designation for these upgraded tanks was the Centurion Mk.5/1 (Aust).
Centurion Mark 5/1 Specifications:
- Crew: 4 (commander, gunner, loader, driver)
- Main Armament: 20 pounder 84mm (3.307 inch) rifled gun, stowage for 62 rounds.
- fully automatic stabilization system for the main gun, able to fire accurately while on the move.
- Secondary Armament: Co-axial L3A1 7.62 × 63mm (.30 caliber) Browning machine gun, 9000 rounds
- Ranging Gun: L6A1 12.7 × 99 mm (.50 Caliber) Browning M2HB machine gun, 4000 rounds
- Armour: 51–152 mm (2.0–6.0 inch)
- Engine: Rolls Royce Meteor IVB, 650 hp (480 kW) at 2550 rpm
- Transmission: 5-speed Merrit-Brown Z51R Mk. F gearbox
- Max Speed: 21.5 mph (34.6 km/h)
20 pounder ammunition:
- Canister: (like a gigantic shot gun) consisted of a black metal cylinder filled with 580 steel pellets (9.5 kg) with an effective range of 229 m (250.4 yards).
- Shot: an Armour-Piercing, Capped, Ballistic Capped (APCBC) round.
- Shell: a High-Explosive (HE) shell with an instantaneous fuze.
- HESH: a High-Explosive Squash Head round, plastic explosive which conforms to the target’s surface before detonating.
- WP (White phosphorus) illumination rounds.
Walk Around: Prime Portal RAAC Centurion Mk5/1
Vietnam
In March 1966, the Australian government decided to increase its commitment to the Vietnam War, announcing that the 1st Battalion, Royal Australian Regiment (1 RAR), which had been serving as the third infantry battalion of the US 173rd Airborne Brigade in Biên Hòa since June 1965, would be replaced at the end of its tour by a two battalion brigade, the 1st Australian Task Force (1 ATF) with armour, aviation, engineers and artillery support, in total 4500 men.
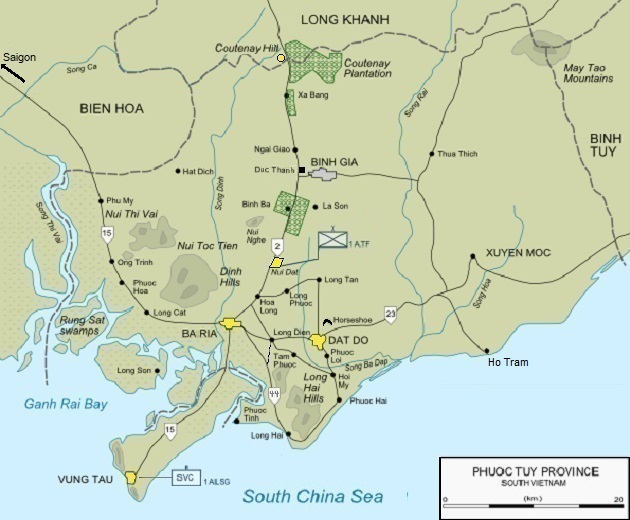
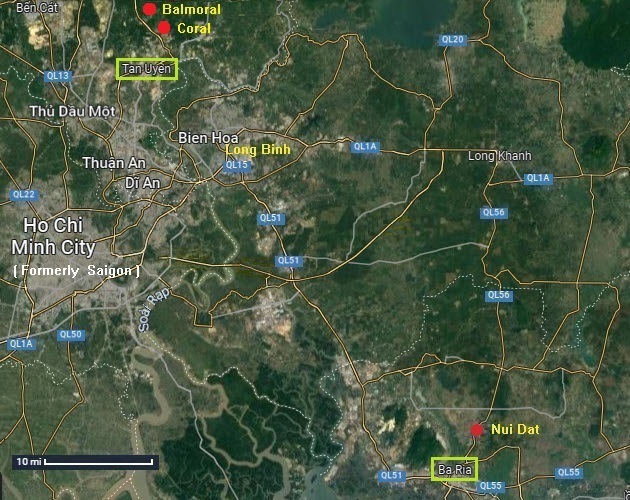
The 1 ATF commanded the Australian and New Zealand Army units in South Vietnam and was based at a rubber plantation at Nui Dat along Route 2, 8 km (5.0 miles) north of Bà Rịa in the Phuoc Tuy Province. In 1967, the Royal Australian Armoured Corps (RAAC), 1st Armoured Personnel Carrier (APC) Squadron was transferred to A Squadron, 3rd Cavalry Regiment in South Vietnam. Although they successfully conducted combat operations in their areas of operations, reports from the field stated that their lightly armoured M113A1 APCs were unable to force their way through dense jungle limiting their offensive actions against enemy forces and they did not have enough firepower to deal with enemy bunkers. The Australian government, under criticism in Parliament, decided to send a squadron of Australian Centurion tanks to South Vietnam.
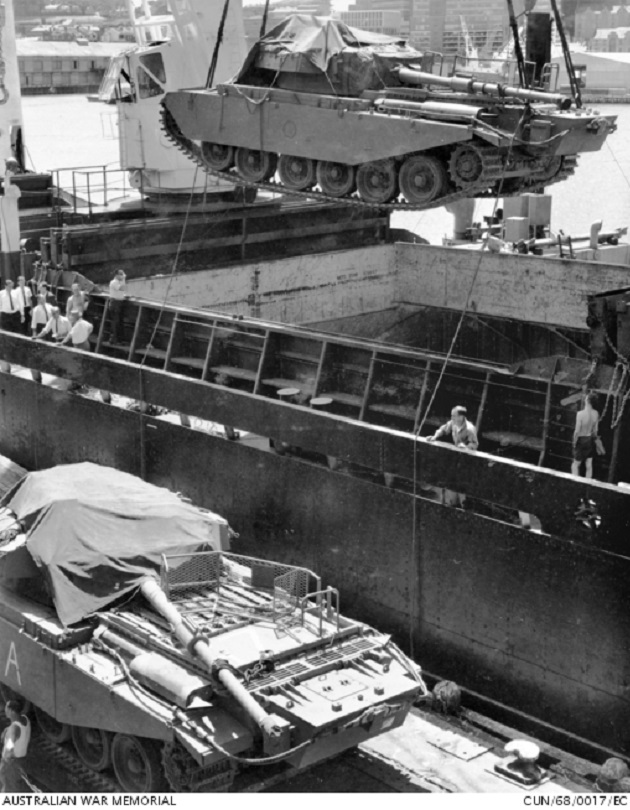
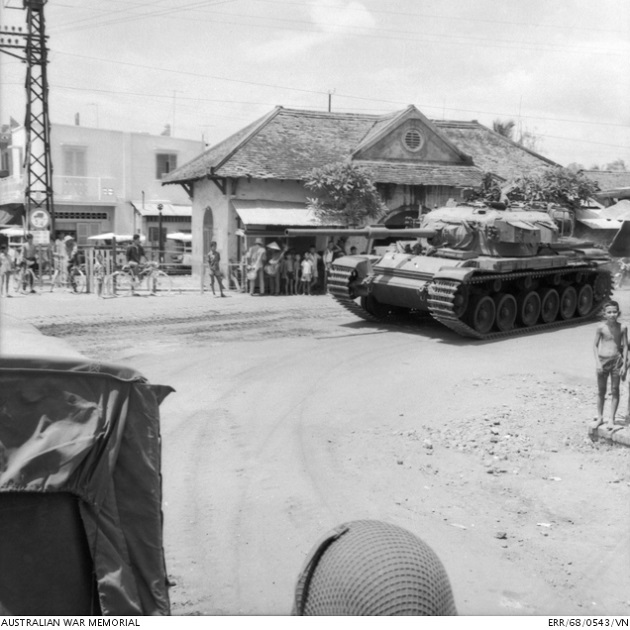
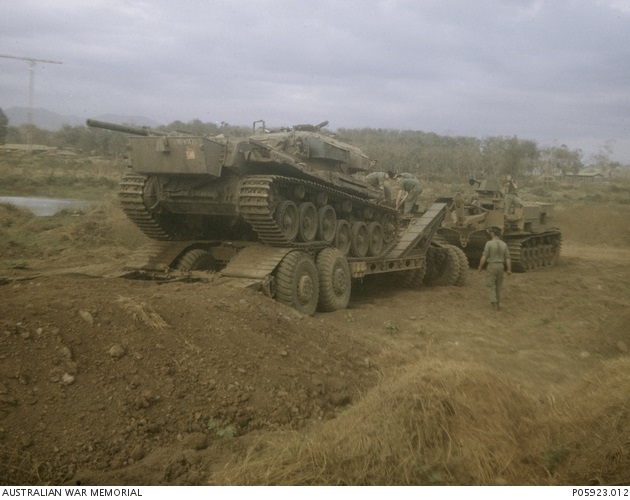
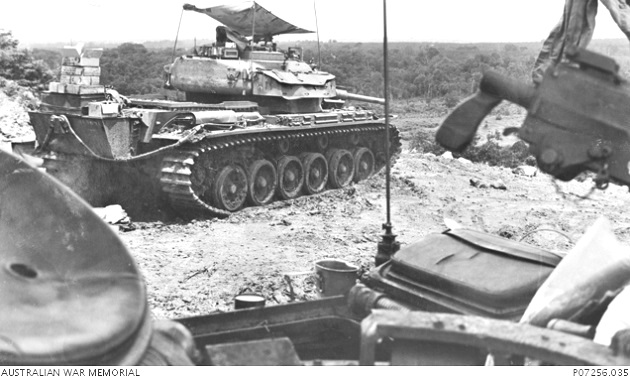
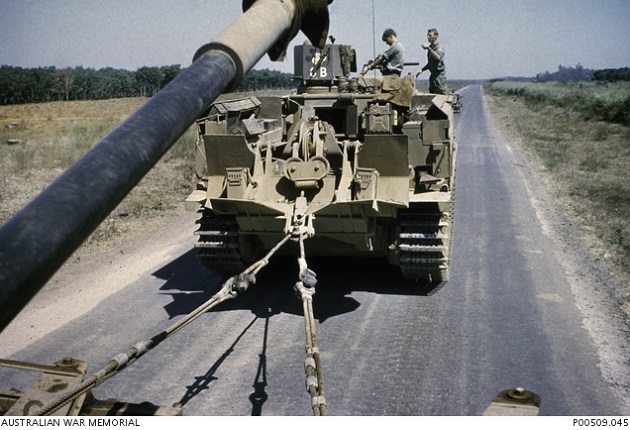
In February 1968 at Pyrmont Wharf, New South Wales, Australia, the first 15 Centurion tanks were loaded on the Australian National Line (ANL) bulk carrier MV Jeparit bound for Vietnam. The Jeparit was moved from her normal berth in Walsh Bay to Pyrmont to enable the Centurions to be loaded. At Pyrmont wharf, the huge floating Titan Crane of the Cockatoo Dock and Engineers Company Pty Ltd, went alongside the Jeparit and lifted each of the 52 ton Centurion from its rail car and lowered it into one of the Jeparit’s cargo holds. Note the external fuel tank on the rear hull of the tanks.
The Japerit arrived at Vũng Tàu, Vietnam on 24 February 1968. The 1st Australian Logistic Support Group (1 ALSG) was an Australian Army ground support unit of the 1st Australian Support Compound. The base was located along the beach in Vũng Tàu, southeast of the Vũng Tàu Airport.
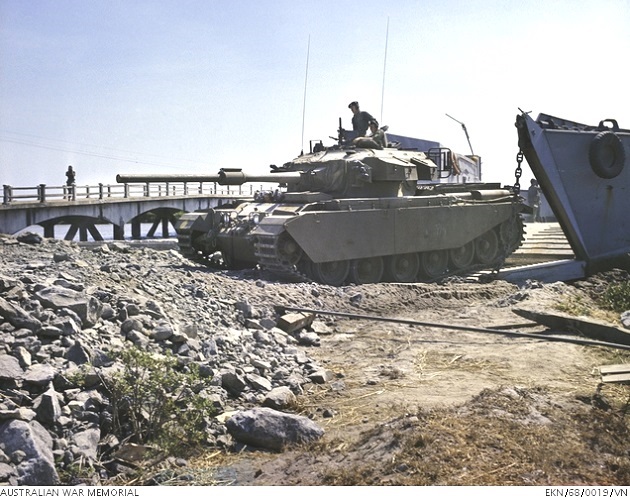
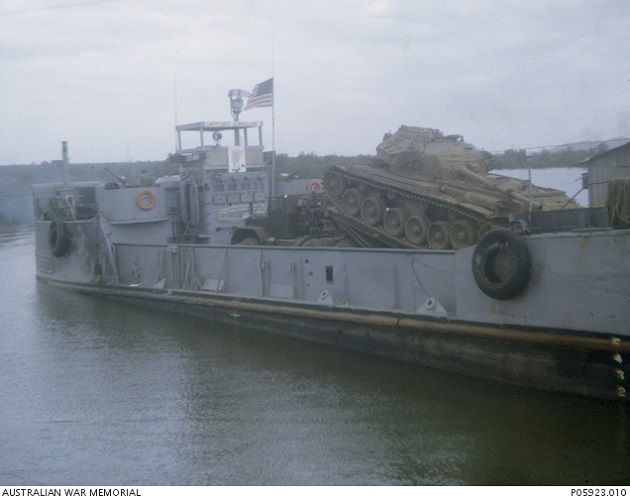
Getting the Centurions off the Jeparit and move them to the Australian main base was a problem. The Americans helped by bringing down a 70 ton ‘Big John’ floating crane from Saigon which lifted the Centurions onto a US Landing Craft Utility (LCU). The LCU then made a short trip, carrying three Centurions at a time, around the peninsula and up the Sông Dinh (river) to a landing west of Bà Rịa. From Bà Rịa, the Centurions were driven up Route 2 to Nui Dat.
Centurion, ARN 169007, of C Squadron is unloaded off a LCU near Bà Rịa in March 1968. See below for more about Centurion 169007.

A Centurion of C Squadron being driven off a LCU onto a rocky beach on the outskirts of Bà Rịa in March 1968.
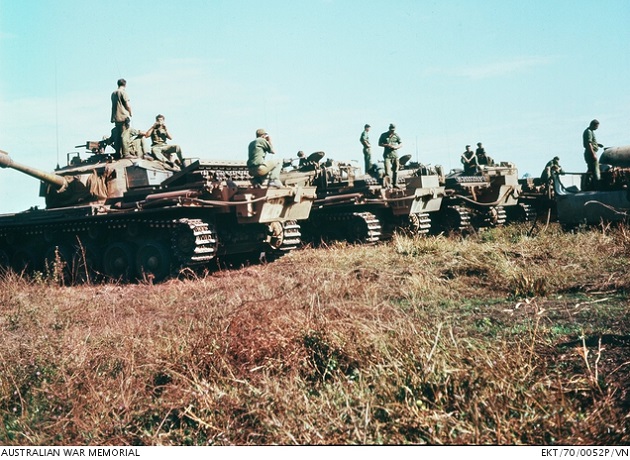
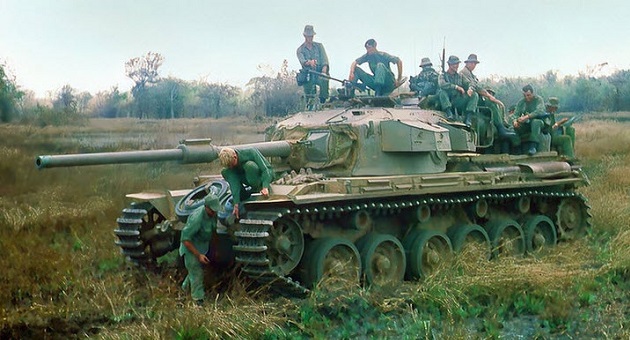
The squadron initially comprised of two troops, each of four tanks, and two tanks of the squadron HQ, as well as two dozer tanks and two bridge layer tanks. A third troop was created by placing the two HQ tanks together with the two dozer tanks. This number constituted only half of the squadron and it was not until August the rest of the squadron, with another two dozer and two bridge layer tanks, arrived from Australia. This brought the squadron up to its full strength of 26 tanks.
Film: Vietnam War: 1st Australian Task Force, 24-27 Feb 1968
1 Armoured Regiment deployments in Vietnam.
| Squadron | Start Month | End Month |
|---|---|---|
| C | February 1968 | February 1969 |
| B | February 1969 | December 1969 |
| A | December 1969 | December 1970 |
| C | December 1970 | September 1971 |
The formation sign was 106 on Diagonal Red over Yellow.
When each squadron was relieved, the tank crews handed over their Centurions to the next squadron and the call signs on the Centurions were changed.
Operation Pinnaroo
In March 1968, Operation Pinnaroo was launched which was a “reconnaissance-in-force” mission. The objective was to capture and destroy bases of the People’s Liberation Armed Forces (Viet Cong or VC) in the Long Hai hills. The Viet Cong designated this area the Minh Dam Secret Zone. Its natural caves and subterranean streams provided a haven from which they could launch raids and propaganda missions into the surrounding countryside.
The first challenge was to get to the area of operations itself. The Centurions had to travel on their tracks for over 100 km (62 miles). During the five week operation, the Centurions working with the infantry and M113 APCs of the 3rd Cavalry proved themselves to be very good at destroying enemy positions. The positions were very well placed and only direct tank gun fire was able to destroy them at a distance.
On 8 March 1968, a Centurion dozer tank fired the first 20 pounder round in Vietnam. HQ 1 ATF had requested help with land clearing in an area known as the Light Green. This was a narrow region of dense vegetation just east of the Long Hai.
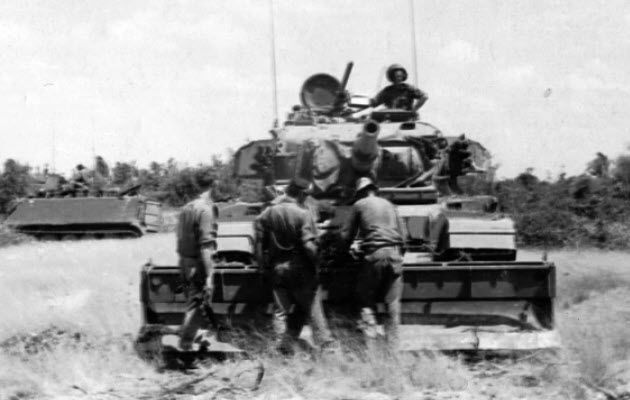
Two Centurions are being used to support the infantry during Operation Pinnaroo. The tanks are fitted with special bulldozer blades and are clearing suspected mined and booby-trapped areas in the Long Hai Hills.
Film: Australian Tanks Support Troops In Operation Pinnaroo, 19 March 1968
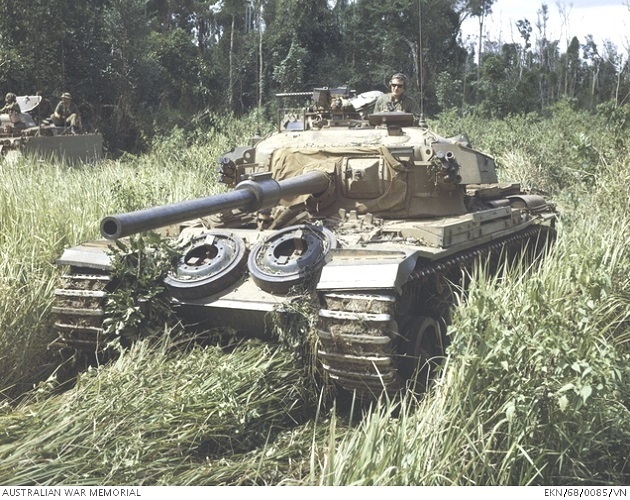
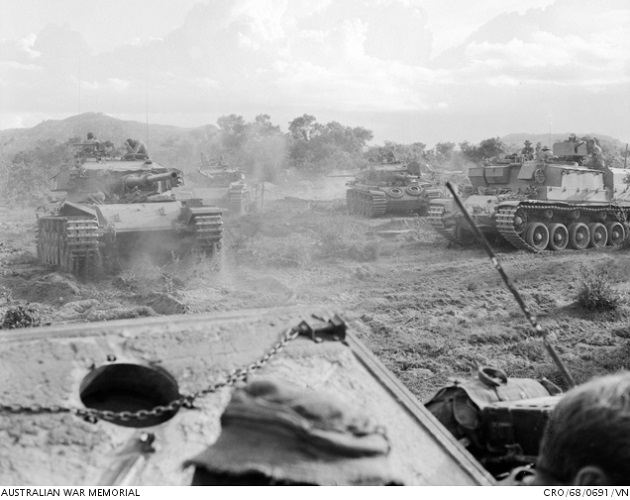
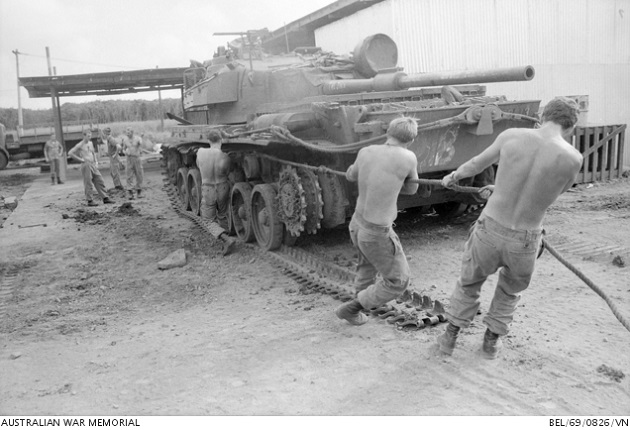
In April 1968, Centurion tanks of C Squadron form a line at the foothills of the Long Hai Hills before moving out with the infantry during Operation Cooktown Orchid southeast of the 1 ATF HQ at Nui Dat. The bazooka plates were discarded during Operation Pinnaro as they became compacted with mud and vegetation. Headlights and track guards were damaged or ripped off by jungle foliage.
This is my close up of AWM CRO/68/0326/VN
Film: AWM F04191 Centurions in Vietnam DPR/TV/835, 3 May 1968
Coral and Balmoral
Soon after the failed TET offensive in January-February 1968, the People’s Army of Vietnam (PAVN) and Viet Cong (VC) launched another phase of their offensive (also known as the May Offensive, Little Tet, or Mini-Tet) against targets throughout South Vietnam, including Saigon on 29 April 1968. The PAVN/VC successfully penetrated the capital on May 5, plunging Saigon into chaos in an attempt to influence the upcoming Paris peace talks scheduled to begin on May 13. During three days of intense fighting, the attacks were repelled by US and ARVN forces. By May 12, the fighting was over, and the PAVN/VC were forced to withdraw after suffering heavy casualties.
On May 12, the 1 ATF was redeployed to intercept the withdrawing enemy forces from Saigon, with two battalions establishing a Fire Support Base named FSB Coral, just east of Lai Khê in the Bình Dương Province. Poor reconnaissance and inadequate operational planning led to delays and confusion during the fly-in, and the Australians had only partially completed the FSB by the evening. The enemy launched a number of battalion sized assaults on the incomplete FSB during the night of May 12/13 before being repulsed by superior firepower the next morning. Casualties were heavy on both sides. Coral was again assaulted in the early hours of May 16, coming under a heavy barrage followed by another regimental sized attack. On May 22, Coral was attacked again, coming under a short but accurate mortar bombardment that was subsequently broken up by return artillery and mortar fire. Casualties were heavy on both sides.
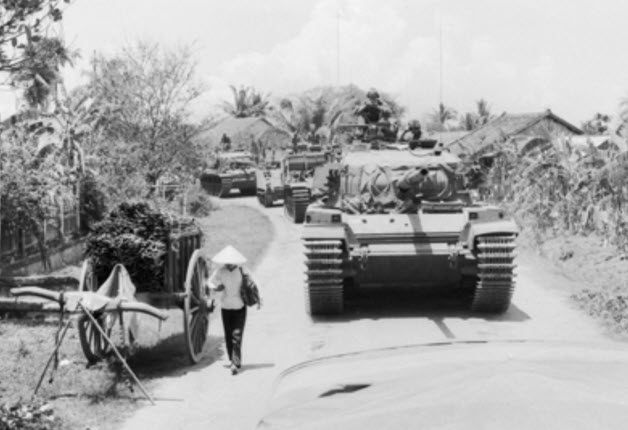
In order to bolster defenses and provide an increased offensive capability, on May 21 the Centurion tanks were ordered to travel 120 km (75 miles) from Nui Dat to FSB Coral, north of Tan Uyen. The slow moving armoured column departed on May 22, traversing the difficult terrain that included a number of old, rusting Bailey bridges, which threatened to collapse when the 52 ton Centurions crossed them. Moving along the inland route under cover of an observation helicopter, the column drove north on Route 2 (today QL56) to Long Khanh, then west on Highway 1 (today QL1A) to Long Binh where the column camped overnight. Just north of the Blackhorse Base Camp (US 11 ACR), the lead vehicle of the convoy, a Centurion dozer tank, ran over a road mine and was damaged but no casualties.
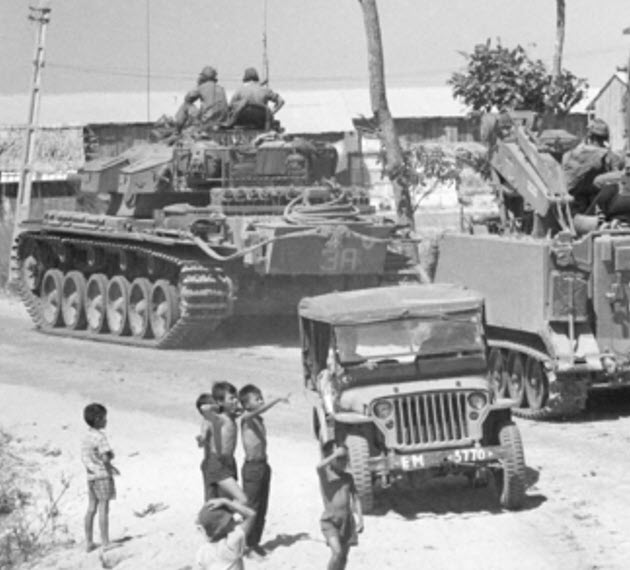
The column is passing through a Vietnamese village.
The column passes local civilians on the road march. Following the Centurion is a Centurion ARV, then a M113 APC, and another Centurion brings up the rear.
This is my close up of AWM ERR/68/0544/VN
During a break, the tank crews enjoy a refreshing drink while standing on their tanks. Note the large Vietnamese sign in the foreground.
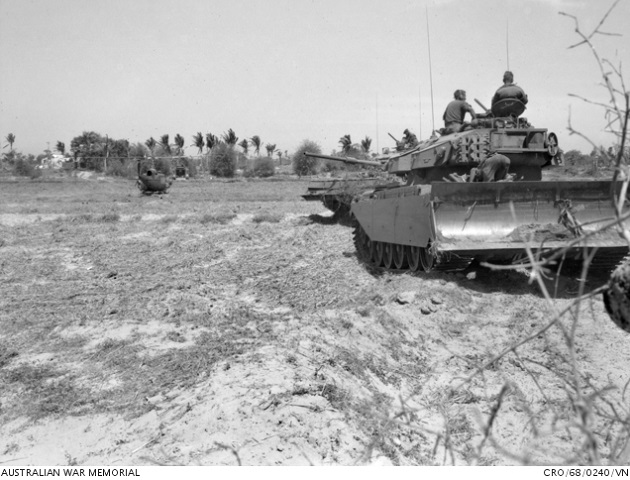
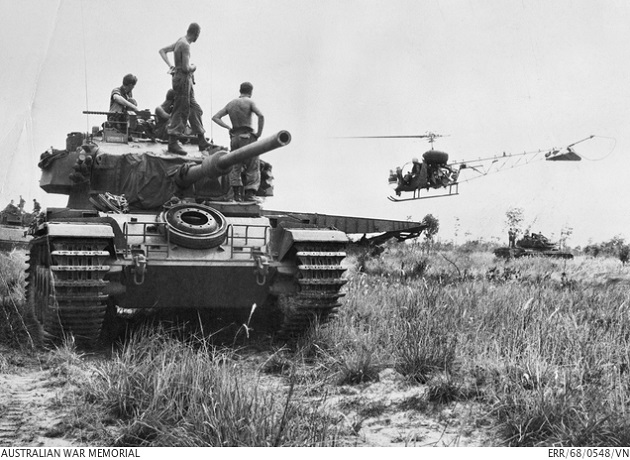
A Centurion crew watches a Bell (Westland) H-13 Sioux helicopter land in background. Behind the tank is a Centurion bridge layer. Note the spare road wheel on the front hull.
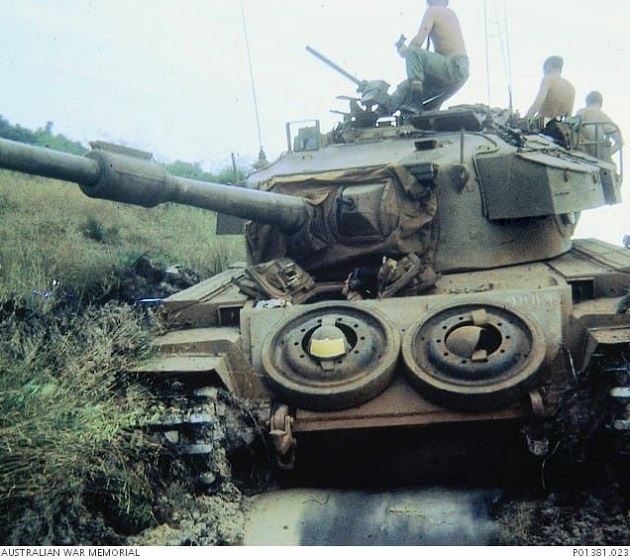
Long road marches created many unexpected problems. Continually driving tanks on roads in high ambient temperatures of the tropics caused the bonding of the road wheel rubber tires to fail. This often resulted in the rubber being shredded from the wheels. Therefore, spare road wheels were carried on the front glacis plate to be used as immediate replacements. As a secondary benefit, they provided some additional frontal protection against enemy Rocket Propelled Grenades (RPG).
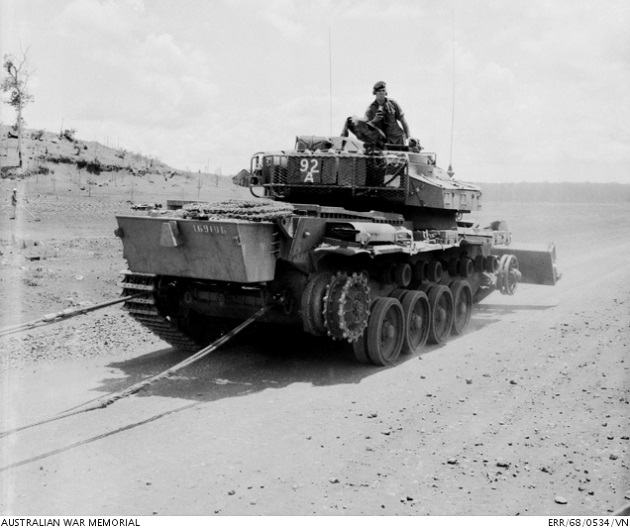
A Centurion dozer with call sign 92A (Nine Two Alpha) being towed back to a US base after running over a tank mine. Note the missing right track, a suspension unit damaged and a bent track guard.
The convoy finally arrived at FSB Coral at 0230 hours on May 23. Four Centurions from 1 Troop were subsequently allocated to 1 RAR, while 2 Troop was allocated to 3 RAR.
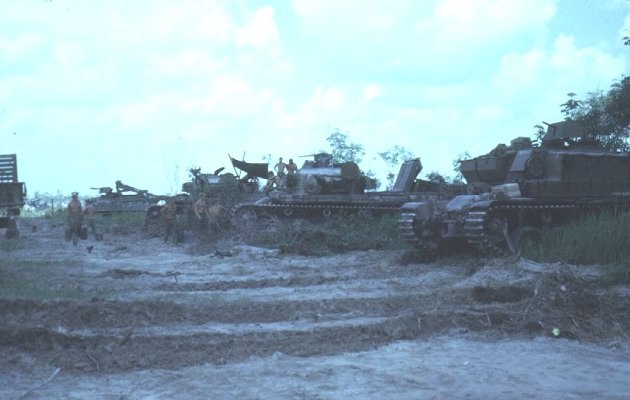
Photo: Bob Parkyns
Two US M42A1 twin 40mm Bofors Self-Propelled Anti-Aircraft Guns “Dusters” (based on M41 tank chassis) accompanied the Centurions on the road to Coral. They helped strengthened the FSB perimeter in a ground support role.
With 3 RAR achieving limited results at Coral, it was suggested that the battalion to re-establish in a new location in order to locate and destroy the enemy bases suspected to be in the area. 3 RAR subsequently occupied FSB Balmoral, 4.5 kilometers (2.8 miles) north of FSB Coral, on 24 May in the hope of provoking another battle. On May 25, 3 RAR began local defensive and familiarization patrols. Four Centurion tanks from 2 Troop, C Squadron were ordered to redeploy to FSB Balmoral to bolster the defenses, escorted by two infantry platoons from B Company, 1 RAR. En route, the enemy engaged the Australian infantry from a series of bunkers, pinning them down with machine gun fire at close range. In response, the Centurions moved forward, suppressing the bunkers with canister rounds while the infantry was extracted. The Australians had struck the edge of a large, defended base camp estimated at company size, however they were under orders to continue to Balmoral before nightfall so they broke contact.
On May 26, the clearance of the bunker system that had been located the previous day was ordered and a combined force of D Company, 1 RAR and 1 Troop, C Squadron was tasked with carrying out a reconnaissance-in-force mission. Departing at 0600 hours in the morning, at 1227 hours the lead Australian infantry platoon was hit by small arms fire and RPGs 3000 meters (3300 yards) from Coral, after having paused to direct an air strike by Canberra bombers from No. 2 Squadron RAAF onto a nearby bunker system. In what would become the first Australian combined infantry and tank assault since the Bougainville campaign against the Japanese in the WWII, the tanks were ordered forward and attacked the bunkers with anti-tank solid shot and machine gun fire, while the infantry identified targets with their M79 grenade launchers. Moving forward two or three abreast, the Centurions crushed many of the bunkers with their tracks and engaged others at point blank range with their main gun. Further bunkers were exposed when the foliage was cut away by canister rounds and the infantry followed the tanks using rifles and grenades, while assault pioneers provided support with a flamethrower as artillery and mortar fire engaged targets further away.
A Centurion with call sign 32 of 2 Troop, C Squadron, in the northeast sector of FSB Balmoral during the final moments of the attack at dawn on May 26. The Centurion is on the left.
The bunkers were well constructed and camouflaged, while visibility was limited to just 10 to 20 meters (11 to 22 yards) among the dense vegetation and consequently many were not located by the Australians until they were on top of them. The bunkers were sited to be mutually supporting, and the enemy defending them responded with a crossfire of RPGs, although the heavy armour of the Centurions proved impervious and they remained undamaged. During a three hour battle, the Australians fought each bunker individually. However, aerial reconnaissance revealed that the bunker system was part of a much larger base area, and with the size of the current force it was judged too small to deal with it and the Australians were ordered to redraw.
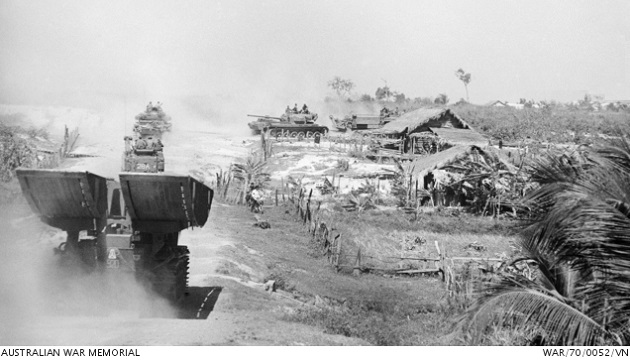
On 9 July 1968, Centurions of C Squadron during Operation Blue Mountains in southeast Phuoc Tuy Province. The tanks were operating in support of the infantry in the sweep of the area north of the Long Hai Hills. Note not all Centurions carried spare road wheels on the front hull. On the right is a Centurion ARV.
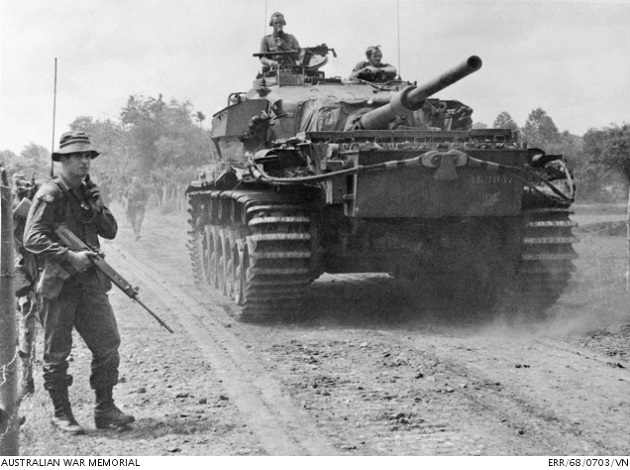
Centurion, ARN 169037, of C Squadron with call sign 32A, moves along a lane near the village of Hoa Long in Phuoc Tuy Province on its way towards a blocking position for a one day sweep by troops of 1 RAR.
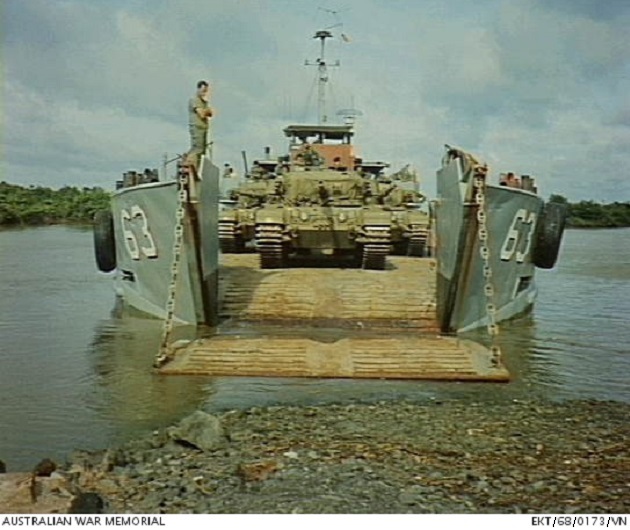
On 12 September 1968, Centurions of C Squadron about to unload from US LCU No. 63, on the outskirts of Bà Rịa. These are 3 of 11 additional Centurions that arrived in Vietnam.
Centurions of C Squadron on a road patrol passes Vietnamese civilians, September 1968. Off the road to the left is a M577 Command Post Carrier (based on the M113 APC).
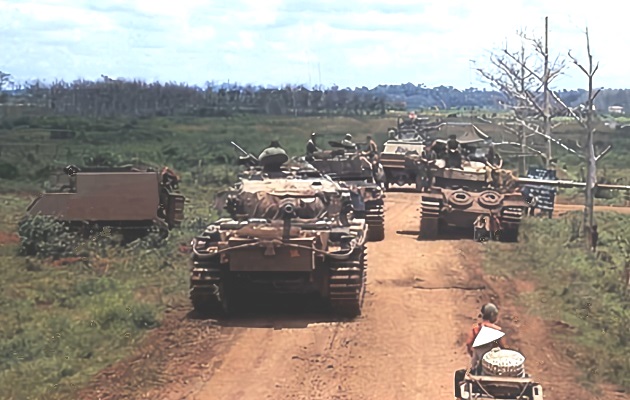
Photo: Gary Willits
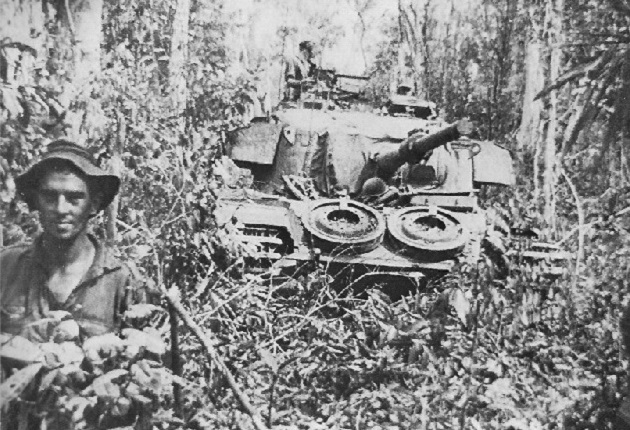
Centurion of C Squadron with call sign 31A moving through dense jungle in Phuoc Tuy Province, September 1968.
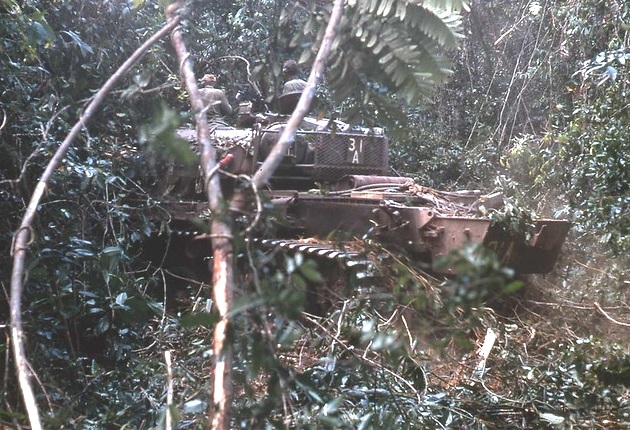
Photo: Gary Willits
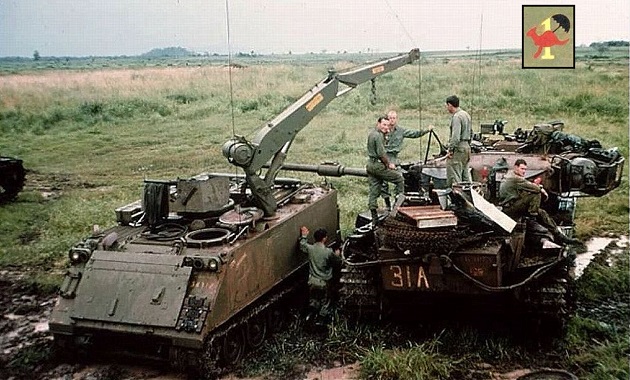
A M113A1 Fitter is assisting with field repairs on a Centurion of 1 Troop, C Squadron with call sign 31A. On the turret of the Centurion between the two stowage bins is a logo of kangaroo with an umbrella over a number 1 (see insert image).
A Centurion of C Squadron slipped off the road and got stuck in a ditch. Troopers had filled the ditch in front of the tank with cut wood to throw under the track for traction. Note the left track had tore up the road surface. The troopers are taking a smoko (smoke) break.
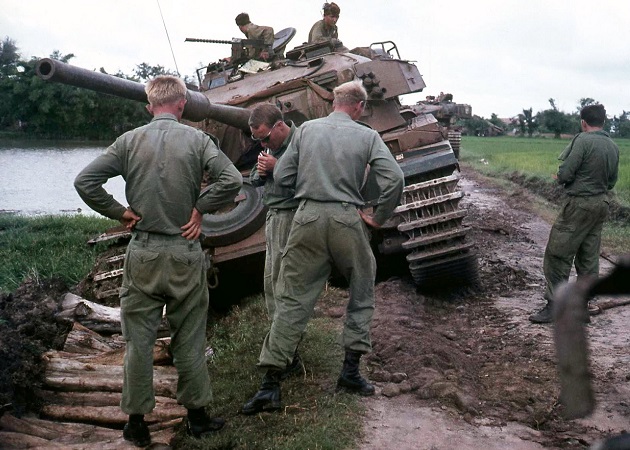
Photo: Gary Willits
Centurion with call sign 32B (Three Two Bravo) of C Squadron is stuck in a ditch. Crewmen of Centurion 32C are connecting tow cables to Centurion 32B to pull it out of the ditch.
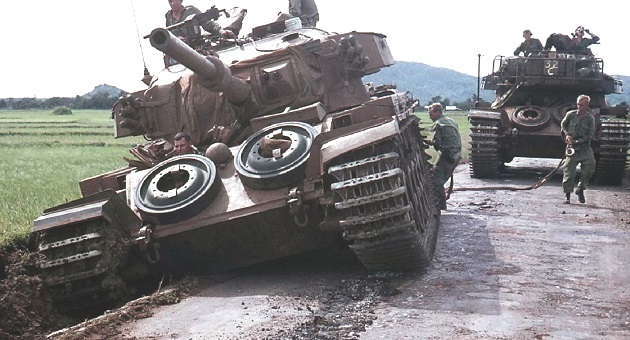
Photo: Gary Willits
Film: AWM F04245 Tanks in operation DPR/TV/936, 9 October 1968
In December 1968, Centurion tank, ARN 169017, was badly damaged by a mine. A Centurion ARV is winching the damaged Centurion onto an M151A2 trailer which is towed by a M123C Prime mover.
A US LCU carrying the damaged Centurion, ARN 169017, on the M123C/M151A2 trailer combination transporting it to Vũng Tàu for shipment back to Australia.
In Australia, Centurion, ARN 169017, was rebuilt using a hull cannibalized from a Centurion purchased in a batch of 8 from New Zealand. The “rebuilt” Centurion 169017 returned to South Vietnam in November 1970 and served again with C Squadron from January 1971 to September 1971. It was damaged again in 1971 (See below).
1969
South Vietnam has only two seasons, a dry and a wet season. The rainy season is between May to November with an average annual rainfall in coastal areas around 1500 to 2500 mm (59 to 98 inches).
For tank crews, the dry season meant operating through a constant haze of dust that penetrated their clothing, permeated their pores and worked its way into their eyes and ears. The heat and humidity could become difficult to bear inside the tank that magnified the outside temperature. In the wet season, a different set of problems emerged, not the least of which was the need for vigilance against getting one’s tank bogged down in the mud. Rain and damp, however, caused the most obvious and most common problems. Men stayed wet for much of the time and being inside the tank made little difference even if the hatches were open.
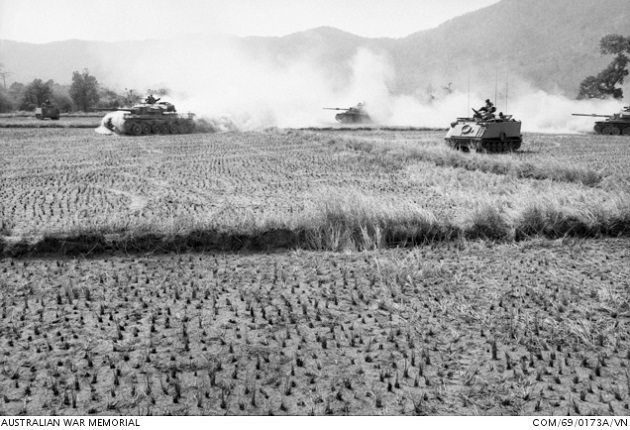
During the dry season, M113s and Centurions on patrol cross a dry rice paddy field kicking up a lot of dust.
Operation Surfside
During April 1969, there were growing number of reports of enemy build ups in the area of the Ho Tram Cape on the coast. Aerial reconnaissance had found that the beach in that area was being used by enemy shipping to land supplies for their installations in the May Tao Mountains. Operation Surfside was launched April 12 and ended on May 2. While the attack force advanced southward from Xuyen Moc to Ho Tram, only twelve contacts with small groups of enemy occurred. Numerous bunker systems were found but in most cases they were very old, although in each system, one or two bunkers had been recently refurbished. In all, some three hundred bunkers had been found, most of them were demolished.
On April 18, troopers of 5th Battalion, The Royal Australian Regiment (5 RAR), advancing through thick jungle, supported by a Centurion of B Squadron search for the elusive Viet Cong during Operation Surfside.
This is my close up of AWM COM/69/0250/VN
A and C companies of 5 RAR reported movement of sampans in front of their locations on the beach at Ho Tram Cape. On the afternoon of April 25, 2 Platoon reported four vessels 1000 yards (914.4 m) offshore. By 1930 hours, thirty sampans had moved within 50 yards (45.72 m) of the beach in front of 2 Platoon. It appeared as though they were going to land. Although these craft were in restricted waters, orders were given to hold all fire until they actually landed on the beach. A large junk (sailing ship) was standing further out to sea and was signaling to someone on shore. Shortly after this the armada moved quickly eastward. Obviously, the junk did not receive an “all clear” signal from shore and aborted the landing. A search of the area revealed thirty four nautical charts of the south east coast of China and the south China Sea.
Troopers digging out Centurion, ARN 169104, with call sign 24B of B Squadron, bogged down on a sandy beach. This beach might be somewhere along Ho Tram Cape.
During May-June 1969, a Centurion is bogged down in the mud northwest of Bà Rịa. Six M113A1s tried unsuccessfully to pull it out. A Centurion ARV was required to complete the job.
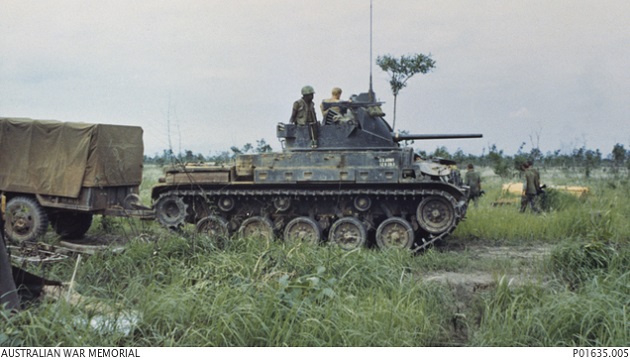
In June 1969 at Nui Dat, a Centurion of B Squadron prepares to go out in support of the infantry. The Centurions must be ready to move at a moment’s notice. Note the crew quarters behind tank.
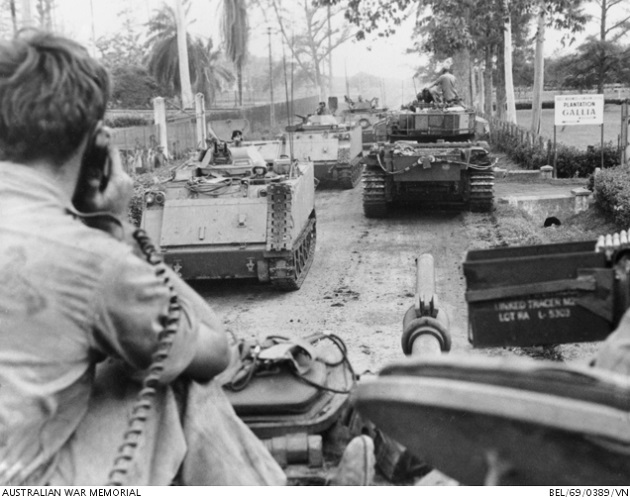
Near Binh Ba in June 1969, Centurions of B Squadron and M113A1 APCs travelling on Route 2 passes Plantation Gallia (sign on right). The M113A1s have Cadillac Gage T50 turrets mounting twin .30 caliber machine guns.
Operation Hammer
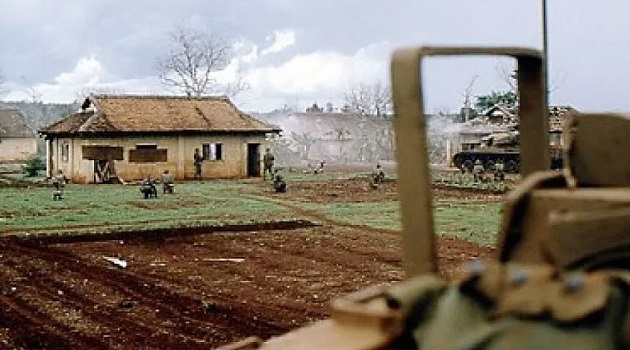
On the morning of 6 June 1969, two Australian Centurions were making their way northwards along Route 2 when they came under fire from a nearby house in the village of Binh Ba, 8 miles north of Dui Dat. Some believe the shot was fired by a nervous enemy soldier and others believe it was a deliberate provocation. Within hours, an Australian force sat just beyond Binh Ba awaiting the order to go in and clear the village. Binh Ba, a picturesque village with a well ordered street scape, solidly constructed houses and verdant, productive gardens would soon become a battle ground.
After the Centurion was hit, two Regional Force platoons were sent to investigate but were stopped by heavy fire from the village. The 1 ATF’s ready reaction force, D Company, 5 RAR, was ordered to mount a clearing operation of the village. At 1000 hours, the reaction force in M113 APCs of B Squadron, 3 Cavalry Regiment accompanied by a composite troop of Centurions from B Squadron left Nui Dat. Half an hour after leaving Nui Dat, the reaction force deployed about 300 meters (328 yards) southeast of Binh Ba and awaited for clearance to move in. By 1120 hours, the Australians were cleared to move in.
Approaching from the east, the Australians advanced with the Centurions in the center of the formation and the M113s on either side and to the rear. Ahead of them, the Centurions advanced slowly, moving cautiously between rows of houses. The pilot of an observation plane reported enemy troops to be moving through the nearby rubber and two of the Centurions moved off in pursuit of them. One was hit by two RPG rounds, wounding three of the crew, but the gunner, unable to traverse his turret, kept up a steady fire against the enemy whenever they crossed his line of sight. The rest of the Australians continued into the middle of Binh Ba, now with just two Centurions in support. In the center of the village, they came under a storm of fire. A composite VC/NVA force had occupied the village and had fortified all the buildings in the village. The Centurions advanced from house to house under a hail of RPG fire, blasting enemy positions with high explosive (HE) and coaxial machine gun fire. The battle raged on for about four hours.
The supplies of HE rounds were soon expended. Since the tanks were loaded with mostly canister rounds, a new technique of street fighting was improvised. Canister rounds were fired at the roofs of the houses which brought the tiles crashing down on the enemy inside. Some buildings collapsed when the foundations was pulverized from armoured piercing (AP) rounds fired at point blank range. Ball ammunition was used with telling effect as the 0.5” ranging machine guns were fired at doorways and windows. Once the door had been blasted in or a hole put through a wall, the tank crews fired a canister round through the hole, sweeping the inside with hundreds of steel projectiles. Then the troopers rushed in, clearing the houses room-by-room and throwing grenades into the bunkers dug by the villagers for shelter and now being used as cover by enemy troops. Sometimes there were terrifying close quarter fire fights inside the shattered buildings.
The Centurions were running low on ammunition and they extricated themselves from the village. All the Centurions had been damaged by enemy fire, one so severely it was useless for further action. Once the Centurions were safely on open ground away from the village, 9 Squadron RAAF helicopters flew in replacement crewmen, evacuated the wounded and bought in more ammunition. The infantry, having broken out of the village, lined up for a second assault, this time from the west and supported by fresh Centurions from 4 Troop, B Squadron. The savage fighting continued through the afternoon of the next day, ending on the morning of June 8.
One of the Centurions involved in the battle was Centurion, ARN 169007, call sign 24A of B Squadron, named “Buku Boom Boom”. Shortly after the battle, Buku Boom Boom received heavy damage from a 30lb (13.6 kg) Chicom (Chinese Communist) mine and was replaced.
The exposed mantlet provides a good view of the .50 (12.7 mm) caliber Browning ranging MG mounted next to the .30 (7.62 mm) caliber Browning coaxial MG.
This is the rear hull of Centurion named Buku Boom Boom.

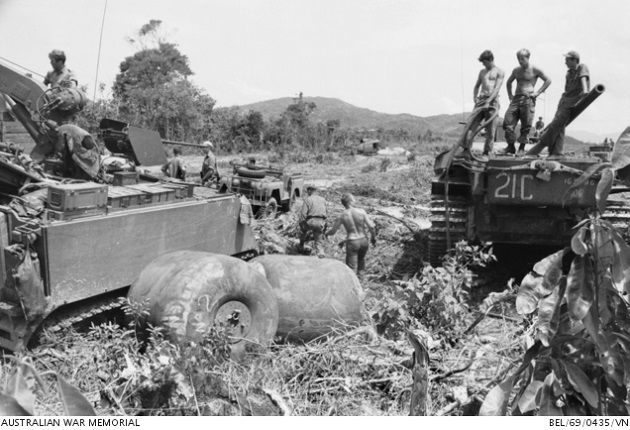
In July 1969, A M113A1 fitters carrier and a Centurion of B Squadron with call sign 21C (Two One Charlie) has refueled from rubber fuel bladders near the Long Hai hills. The Centurion was providing protection for the engineers of the 1st Field Squadron engaged in clearing the foothills of the Long Hai.
Film: AWM F04379 Tanks in Vietnam DPR/TV/1169, 18-21 August 1969
Film: 1st Australian Task Force 1967 to 1969
The 106 Field Workshops, Royal Australian Electrical and Mechanical Engineers (RAEME), part of the 1 ATF, could repair anything from a watch to a tank. In December 1969, a member of the 106 Field Workshop and two tank crewmen are laboring at replacing a track on a Centurion tank at Nui Dat. On the rear hull is a faded call sign 21B.
Centurion, ARN 169089, of B Squadron believed to be call sign 20D (Two Zero Delta) is bogged down somewhere in the Long Hai Hills. The right track appears to be damaged.
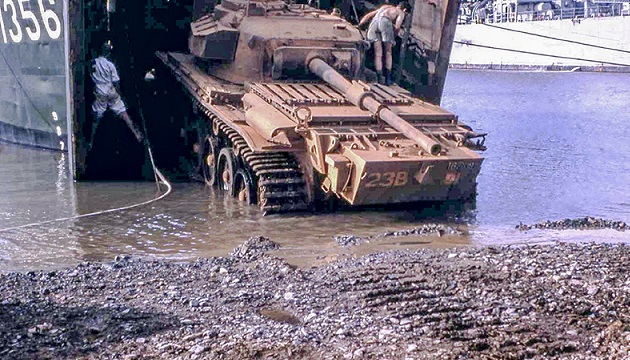
A damaged Centurion of B Squadron is being loaded onto AV1356 Clive Steele at Vung Tau to be returned to Australia. The Clive Steele was ex-US Navy USS LSM-547 which earned four battle stars in the Korean War and was one of four LSMs used by the Australians in Vietnam. The LSM was able to carry four Centurions at a time. Note the Centurion is coated with dried Vietnamese red soil.
1970
Operation Matilda
In December 1969, A Squadron was relieved B Squadron. Operation Matilda was the largest Australian armoured operation since WWII. Forty four armoured vehicles (8 Centurion gun tanks, 2 Centurion bridge layers, 4 Centurion ARVs and 30 M113A1 APCs) swept through three provinces on a 11 day, 150 mile (241 km) search for the enemy forces between January 15 and 26. Despite the fact that the operation did not result in any significant contacts with the enemy, this and other similar operations did denied the enemy the initiative and reduced their freedom of movement in the area. The enemy proved reluctant to stand and fight tanks unless a particularly important installation or supply route was threatened.
Kicking up a cloud of dust, Centurions of A Squadron driving east from Dat Do along Route 23 (today QL55) headed for Binh Tuy Province. A Centurion ARV is bringing up the rear.
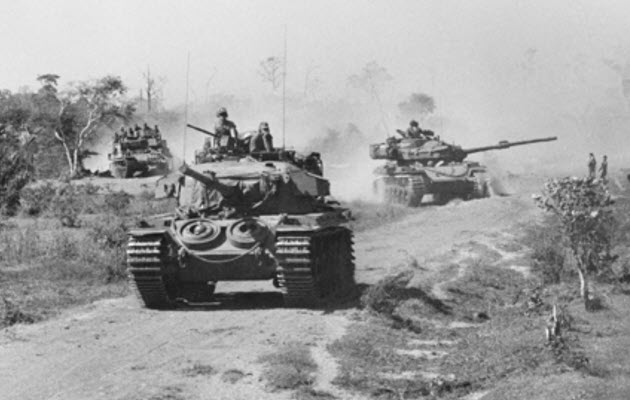
This is my close up of AWM WAR/70/0056/VN
A Centurion of A Squadron negotiating over a bridge span laid down by a Centurion bridge layer.
Centurions of A Squadron stopped for refueling during Operation Matilda.
Centurions of A Squadron halted on Route 23. Note the empty bracket for a spare road wheel on the front hull. The crew probably replaced a road wheel while on the road since the crew would had gotten another spare before the operation began.
M113A1 APCs and Centurions advancing through a village. In the foreground is the rear of a Centurion bridge layer which proved valuable for bridging normally impassable gaps. One of the Centurions had pulled off the road.
Centurion with call sign 3A driving through a village in the Binh Tuy Province followed by a M113A1 fitters vehicle. Note the Centurion has a rack of Jerry cans mounted on the engine deck, most likely carrying water.
This is my close up of AWM WAR/70/0061/VN
On 1 January 1970 (before Operation Matilda), Centurion with call sign 3B is driving up onto the road. In the foreground on the left is part of a wooden bridge which the Centurion is to heavy to cross. The Centurion had forded the river and has drove up the riverbank. This Centurion also has a rack of Jerry cans mounted on the engine deck but they are laying on their sides.
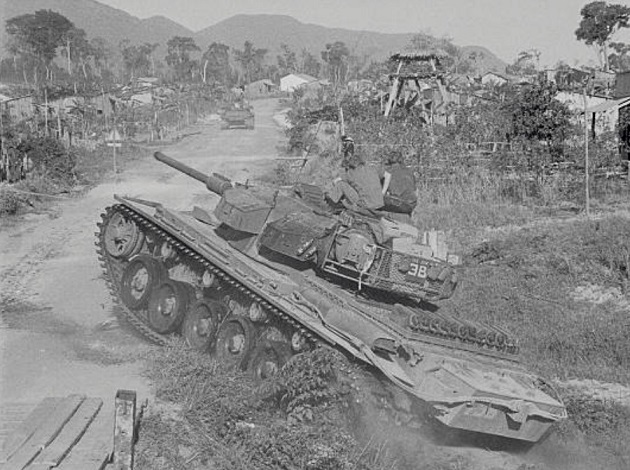
Photo: Bettmann/GettyImages
This is a overhead view of Centurion 3B on a jungle trail somewhere in the Binh Tuy Province north of Route 23 on January 22. It is probably before daybreak and the photographer is standing on top of a Centurion behind Centurion 3B which is illuminated by a spot light. Note the small number 2 to the left of the larger 3B call sign.

Sometime later on January 22, Centurion 3B is on a different segment of the trail with broken right track probably caused by a mine.
This is my close up of AWM P04665.565
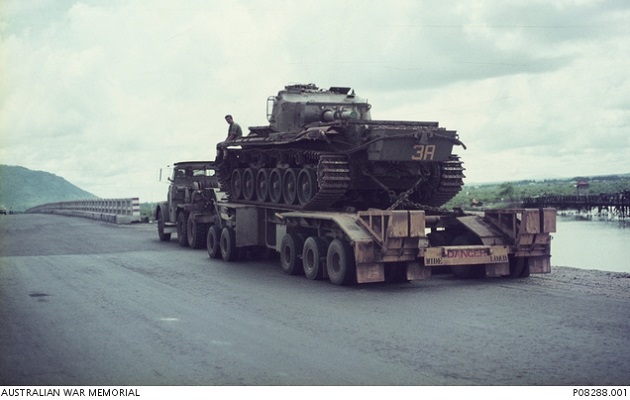
A damaged Centurion with call sign 3A being transported on a No 1 Mk I, 60 ton tank transporter trailer towed by a Leyland Scammell Contractor prime mover. The Centurion is returning to the 1st Australian Logistic Support Group base at Vung Tau, where it will be repaired by the 102 Field Workshop.
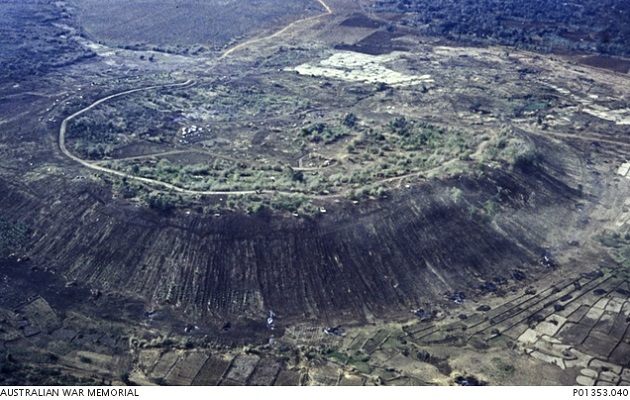
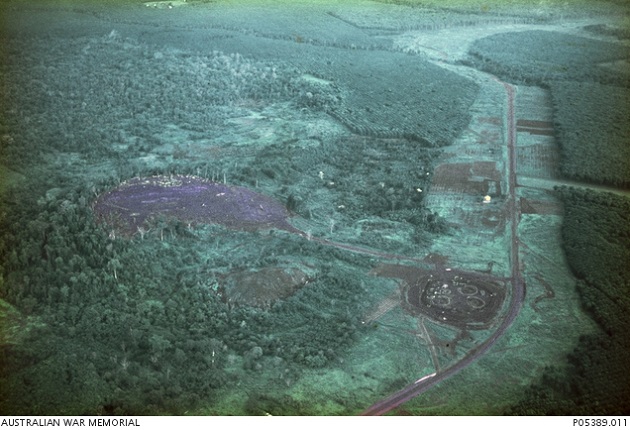
This is an aerial view of the Horseshoe Forward Base in 1966. It was an old volcanic crater rising 882.5 feet (269 m) above the surrounding paddy fields just north of Dat Do.
On 21 May 1970, Centurion, ARN 169036, with call sign 3A, A Squadron at Horseshoe Base. Driver 4720545 Trooper John Allan Gebhardt (left) and gunner 313141 Trooper Rodney Wilden Lynch are ensuring that their tank is ready for any action. Note that the call sign 3A is painted in red.

Later that day, these two troopers participated in an armoured/infantry attack on an enemy camp and bunker system as part of Operation Concrete II, a month long reconnaissance and ambush operation in the Tan Ru region of Phuoc Tuy Province. Located about 5 km (3.10 miles) northeast of Dat Do, the bunker complex was occupied by over 50 Viet Cong of C2 Company, D445 Battalion. During the attack, a RPG rocket penetrated the Centurion’s turret. Gebhardt was severely wounded in the head, back and legs. Lynch only received minor shrapnel wounds. Although Gebhardt was not expected to survive, he eventually made a full recovery.
In June 1970, an infantry patrol of the 7th Battalion, The Royal Australian Regiment (7 RAR), moves pass a dug-in Centurion of A Squadron. Note that the Centurion has no spare road wheels. Barely visible on the upper right edge of the front hull is ARN 169036.
A Centurion of A Squadron carrying troopers is driving through the mud at Fire Support Base Gail in July 1970.
In August 1970, Centurion, ARN 169043, with call sign 1A of A Squadron has halted in a jungle clearing with its crewmen at work on top of the tank. Note there is a rack of Jerry cans on the engine deck.
Members of the Australian ABC Sydney Show-band are riding on a Centurion named “One Two” with the call sign 1C painted on the fume extractor on the gun barrel. Note the band member sitting on front of the turret is holding a movie camera.
Film: Centurion tank 169039 Australian Army in Vietnam 1970-71
1971
Operation Overload
In June 1971, Intelligence reports located the Viet Cong (VC) D445 Battalion and the People’s Army of Vietnam (PAVN) 3/33 Regiment east of Route 2 along the border between Phuoc Tuy and Long Khanh in an area 30 km (19 mi)les north of Nui Dat. A brigade-sized “search and clear” operation was launched. Named after the D-Day landings during the Allied invasion of Normandy in 1944, Operation Overlord was scheduled to begin on the same day, 27 years later. A significant blocking force was inserted, with 3 and 4 RAR/NZ (ANZAC) deployed along the line of the Suoi Ran river, A Squadron, 3rd Cavalry Regiment to their west and US Army 2/8th Battalion, 3rd Cavalry Regiment to the northeast. The Centurion tanks of C Squadron were tasked with driving the PAVN/VC into these blocking positions. The infantry assault pushed through an enemy bunker system with the Centurion tanks in close support crushing many bunkers and their occupants with their tracks. Operation Overlord finally ended after heavy fighting on June 14 and 1 ATF returned to Nui Dat.
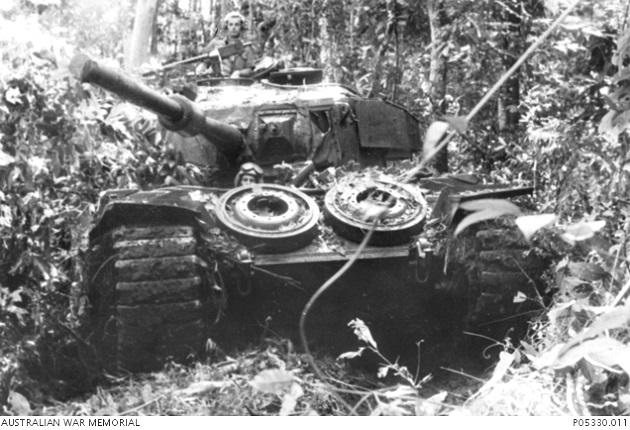
A Centurion from C Squadron is following a Centurion ARV during Operation Overlord. The trooper is sitting on the rear of the ARV with his M60 machine gun “The pig” ready beside him.
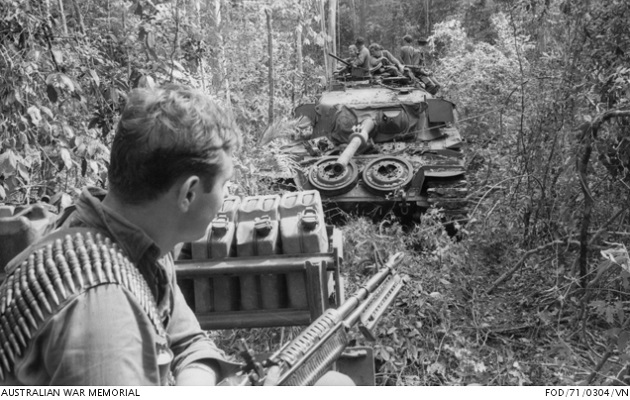
A Centurion of C Squadron moving along a jungle trail on the border of Phuoc Tuy and Long Khanh Provinces.
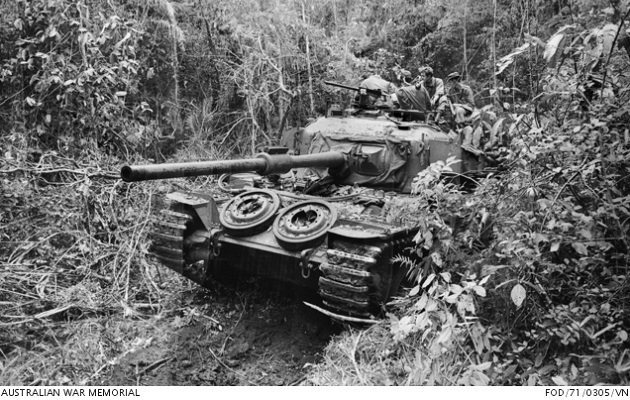
With muddy tracks and covered in debris, this Centurion is pushing through the dense jungle. The driver’s head is visible (wearing helmet and goggles) and the commander (wearing headphones) is at his station in the turret behind the pintle mounted .30 caliber L3A4 Browning medium machine gun.
Courtenay Hill
Courtenay Hill was located on the western edge of the De Courtenay Rubber Plantation north of Nui Dat, 700 m (765.5 yards) west of Route 2 in southern Long Khanh Province. It was a narrow, rocky, 800 foot (243.8 m) high feature, approximately 160 yards (146 m) long by 65 yards (59.4 m) wide, with a sloping south to north summit. On 6 June 1971, the day after the start of Operation Overlord, the 1 ATF established a forward HQ outpost on top of the Courtenay Hill.
After Operation Overlord ended, Courtenay Hill continued to be used as a main HQ outpost for the surrounding area and it was extensively fortified with over 100,000 sandbags, barbed wire, trip flares and claymore mines. Two Helicopter Landing Zones were built, one on northern end of hilltop, and the other on lower eastern side. A Refuel and Water Point was setup on lower eastern side. The hill was topped with 11 RC-292 Radio Antenna Masts.
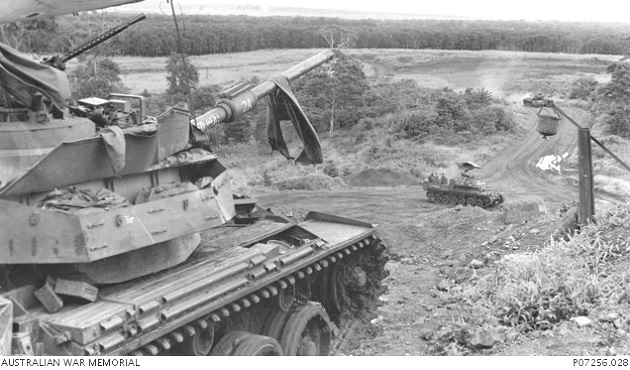
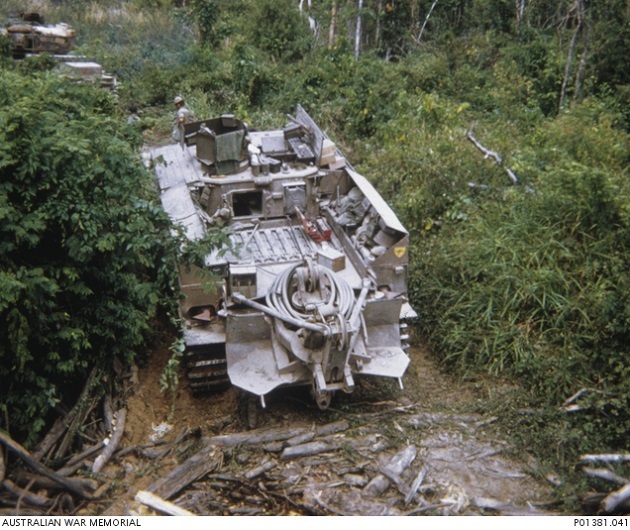
An aerial view of a terraced section on Courtenay Hill where 5 Troop, C Squadron consisting of 4 Centurion tanks, a Centurion ARV, and an M113A1 Fitters vehicle are in a leaguer about half way up the hill on the northern side. The tank crews had set up canvas shelters over the tank turrets and tents next to the vehicles.
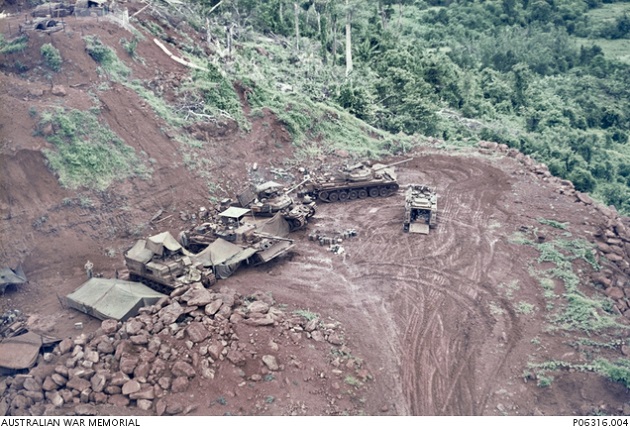
This view is looking down from the top of Courtenay Hill at three Centurion tanks, one of which, Five Alpha (5A) on the right, has a dozer blade mounted. There is also a Centurion ARV (extreme right) and an M113A1 Fitters Carrier at the top left. Some of the crewmen are gathered around or sitting on MOGAS rubber fuel bladders (bottom right).
This is another view looking down from the top of Courtenay Hill at two of the Centurion tanks. The same M113A1 Fitters Carrier is at the top center. The Centurion on the left has been fitted with an infra-red (IR) searchlight (although white light was the only light used in Vietnam) and it was usually stored in the bustle rack on the rear of the turret.
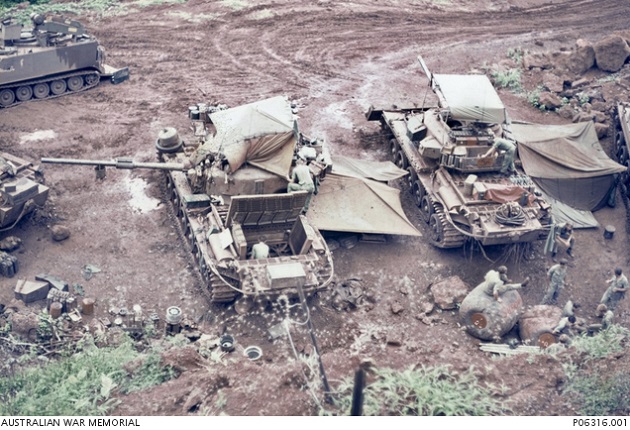
This is the front view of the Centurion dozer tank with call sign 5A which has the name “SLEEPER” painted on the gun barrel. A bucket shower is also suspended from the gun barrel. In the background, the sand bagged observation post is on top of Courtenay Hill.
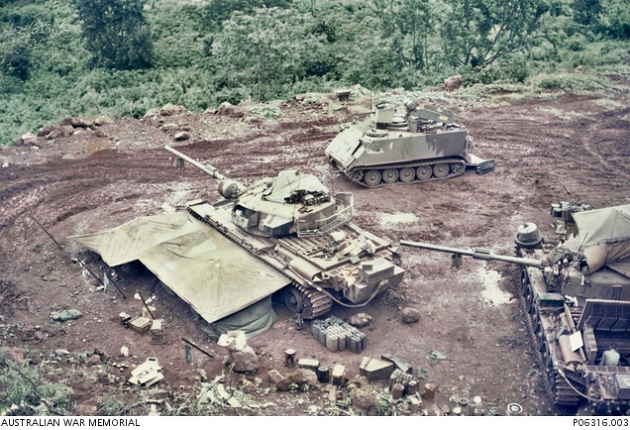
This is the front view of the second Centurion tank with the IR search light mounted on the turret. A sun screen has been set up over the turret and the same sand bagged observation post is on top of Courtenay Hill in the background.
This is another view of the same two Centurion tanks. In the background is Centurion dozer tank 5A named “SLEEPER”. Sitting on the ground in front of “SLEEPER” is a large number of Jerry cans which are probably filled with water.
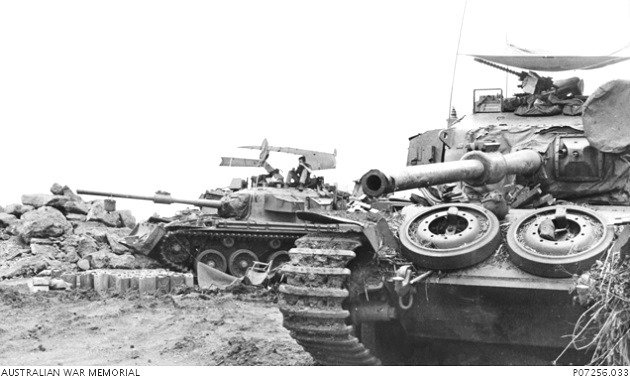
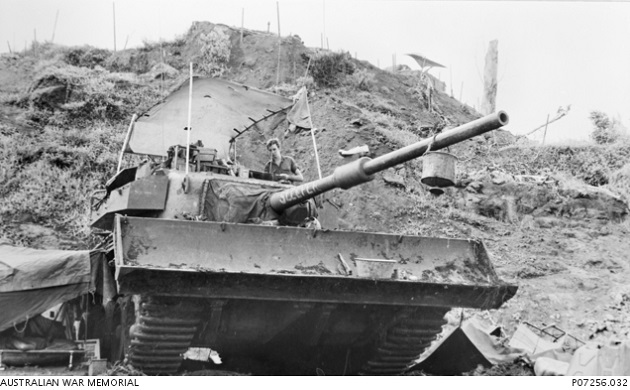
Centurion with the call sign 2A and named “Canned Heat” is firing from the slopes of Courtenay Hill towards the Courtenay rubber plantation. Note the open stowage bin on the side of the turret. Another Centurion is visible further down the road and in the far distance is a mine clearing tank raising dust as it sweeps the approach road to the hill top base. See below for more about the mine clearing tank.
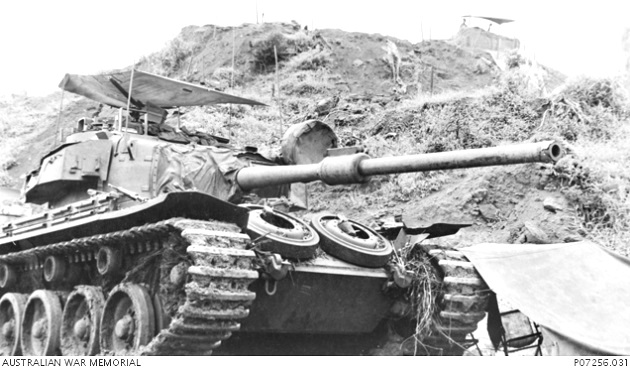
A pair of Centurion tanks are guarding the approach road to Courtenay Hill. Note the ration boxes piled on top of the external fuel tank on the rear hull of the tank.
Troopers of 3rd Battalion, Royal Australian Regiment (3 RAR), are riding on a Centurion tank during Operation Overlord.
Operations that were launched from Courtenay Hill in 1971:
| Operation Code Name | Date Range | Operation Area |
|---|---|---|
| Hermit Park | June 14 to July 27 | Northwest and northeast of Route 2. |
| Iron Fox | July 28 to August 5 | Northwest of Route 2. |
| North Ward | August 6 to September 17 | Northwest and northeast of Route 2. |
| Ivanhoe | September 18 to October 2 | Northeast of Route 2 in the vicinity of Nui Le. |
| Valiant | October 3 to October 6 | East and west of Nui Dat. |
Hermit Park
Operation Hermit Park was an assault on an enemy bunker system. The attack force consisting of centurion tanks, an APC troop and 1 Platoon, V6 Company (4RAR/NZ) crossed the start line and headed towards the objective. Not long after the advance began, a leading Centurion ran over a buried 40-gallon (151.4 Liters) drum. It caused the trooper’s eyes in the surrounding area to water profusely and it made their skin itch and burn. The drum or cylinder probably contain tear gas. The attack force advanced about 50-70 meters (54 to 76 yards) towards the bunker system when the forward left Centurion received a direct hit from an RPG round. The RPG hit the top of the turret around the area just in front of the tank commander’s cupola. Both the commander and his operator were immediately wounded as both turret hatches were fully open. Smoke was coming out of the turret with no sign of crew movement. Once the wounded were evacuated, the attack continued in the same direction towards the objective. The forward Centurions swung left into a line in front of the infantry and fired canister, 50 and 30 caliber into the general direction. The fire fight raged for about 15 minutes. The fire was intense with rounds flying in every direction. The surrounding vegetation above knee height was totally shredded.
Centurion tank named “Iron Outlaw” during Operation Hermit Park, 25–26 June 1971.
On June 25, Centurion, ARN 169056, with call sign 5B was hit by a RPG. It struck the main gun barrel on the lower right side, penetrating at an angle. The driver’s headphones are hanging on the vision block of the open hatch. Most of the canvas mantlet cover was burnt off showing the casting markings.
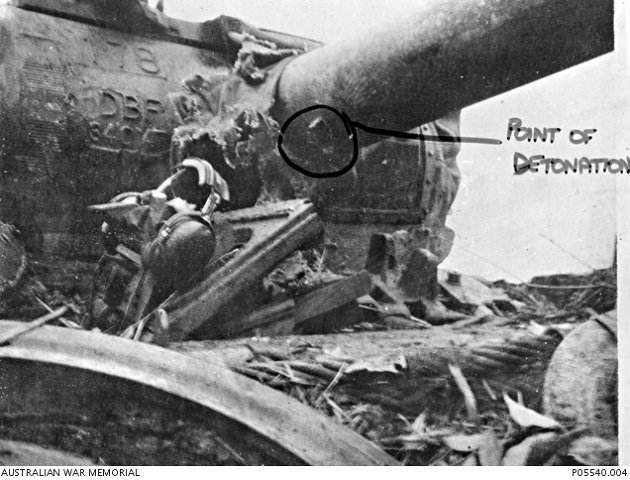
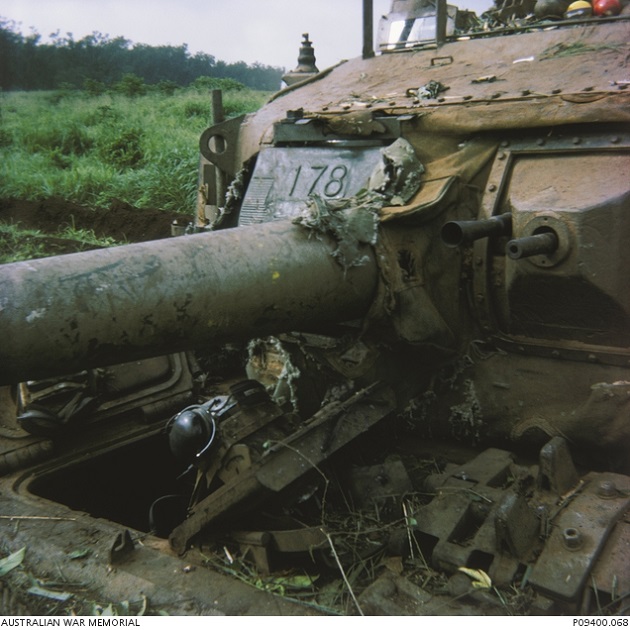
Also on June 25, Centurion, ARN 169017, was damaged while engaging an enemy bunker. It was was hit twice by RPGs. The first RPG hit the muzzle of the gun barrel, obstructing the bore. The second RPG hit the front of the turret, just above the gun barrel and disabled the electric turret drive and the gunners sight. It also damaged the co-axial machine gun, commander’s hatch and the IR searchlight support bar. The Centurion continued to engage the enemy after the incident. Note the casting marking on the turret roof.
Iron Fox
Operation Iron Fox was a typical “hammer-and-anvil” type of operation executed by the Australians in 1971. A blocking force of infantry and APCs would lay ambushes covering the likely VC/NVA escape routes from a selected area, while the tanks drove the enemy onto the guns of the waiting infantry. The 2nd Squadron SAS, 3rd Battalion, Royal Australian Regiment and the APCs of A Squadron of the 3rd Cavalry Regiment formed the blocking force, while the 4th Battalion, Royal Australian Regiment/Royal New Zealand Infantry Regiment (ANZAC) and the Centurions of C Squadron attacked the VC 274th Regiment along the Suoi Ca river. After an artillery and aerial bombardment of the enemy base area, the infantry companies advanced. C Company located a aggressively defended bunker system on the afternoon of July 29 and D Company supported by the Centurions, moved to assist C Company despite extremely heavy undergrowth and broken ground. D Company linked up with C Company forming into an attack formation by nightfall. Following their usual tactics in this situation, the VC withdrew during the night and the bunker system was subsequently destroyed the next morning after being searched by D Company.
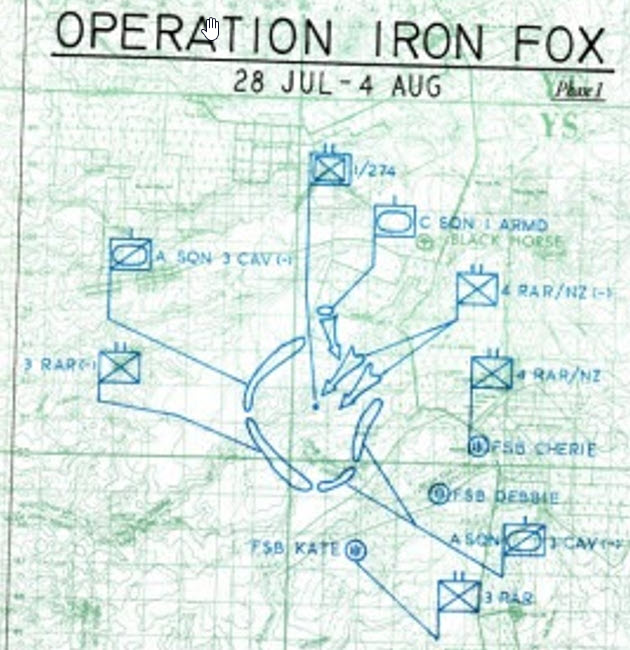
D Company spearheaded the advance down the creek line and again in the afternoon contacted a large occupied enemy bunker system. The Centurions were refueling at that time and they performed a minor miracle to scrub bash over “impossible armoured terrain” to rejoin D Company in the attack in less than one hour. A savage tank battle soon followed. The VC countered the tanks advance by firing RPG rockets into the tree branches immediately above the tans, knowing that the Centurion crews fought with open hatches for increased visibility and ventilation. The VC also learned that the Centurions would continue to fight despite repeated direct hits to the hull and turret. By firing into the jungle canopy above the Centurions, the enemy were able to incapacitate the crews with fragments from the rockets exploding above them.
Withdrawal
In November 1970, the Australian withdrawal from Vietnam began due to anti-war pressure at home. The size of 1 ATF was reduced from three infantry battalions to two. In September 1971, the Centurions were subsequently withdrawn from Vietnam.
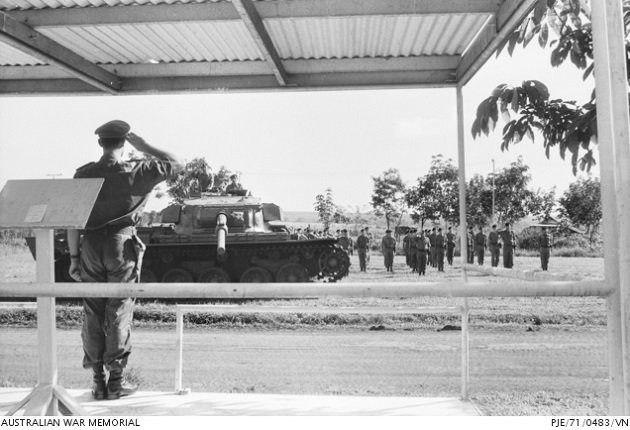
At Nui Dat, Colonel D. D. Weir, Deputy Commander of the 1 ATF, takes the salute from the men of C Squadron, as the unit’s last Centurion to be withdrawn from Vietnam drives ceremoniously from the parade ground.
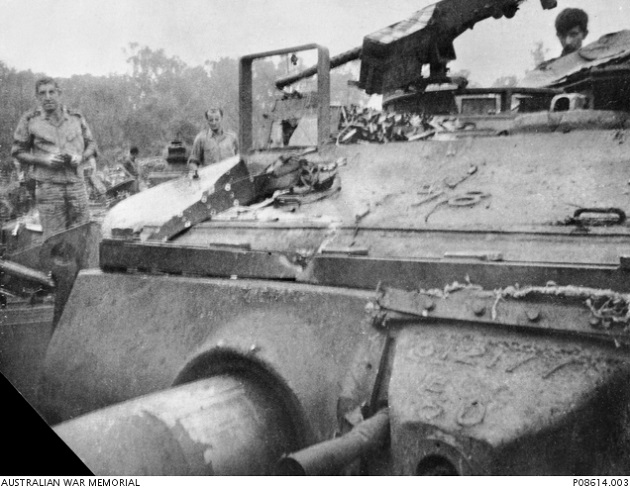
On 16 October 1971, the Australian forces handed over control of the base at Nui Dat to South Vietnamese (ARVN) forces, while the last Australian infantry battalion in South Vietnam, sailed for Australia onboard the HMAS Sydney on 9 December 1971. A total of 58 Centurion tanks had served in Vietnam where 42 had suffered battle damage, of which six were beyond repair, while only two crewmen had been killed in action.
Mine clearing Tanks
During the war, the enemy used land mines extensively, either in ambushes, booby traps or more conventional tactics, such as along roadsides. Clearing roads of mines was a slow and laborious process. Individual troopers would have to walk down roads or trails with metal detection equipment or other hand held mine detection methods exposed to possible ambush by the enemy. Some mine detection systems did not work because they could not detect the material from which the mines were made of. In Vietnam, 75% of combat vehicles were damaged or lost to mines. Clearing long stretches of road manually took most of a day. A faster and more efficient method to clear roads of mines was needed.
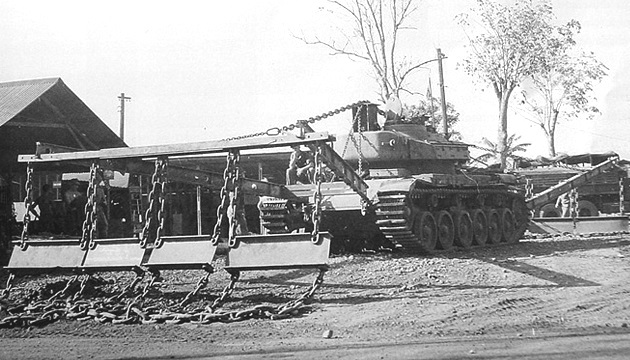
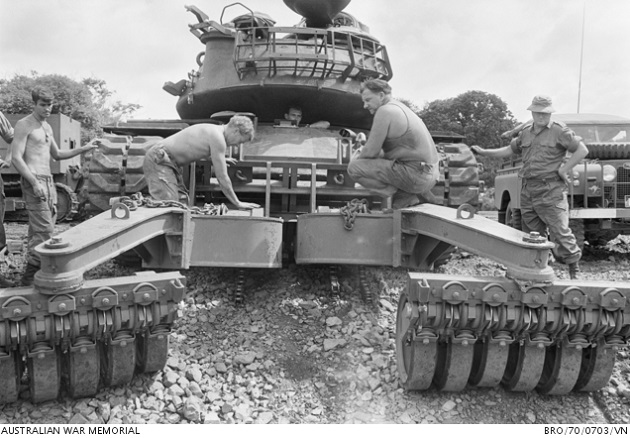
The 1st Field Squadron, Royal Australian Engineers (RAE), fitted this field built mine clearing sled to the front and back of a Centurion gun tank in early 1968.
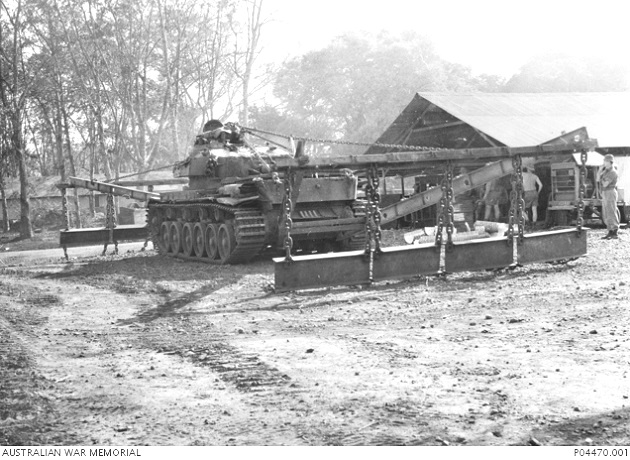
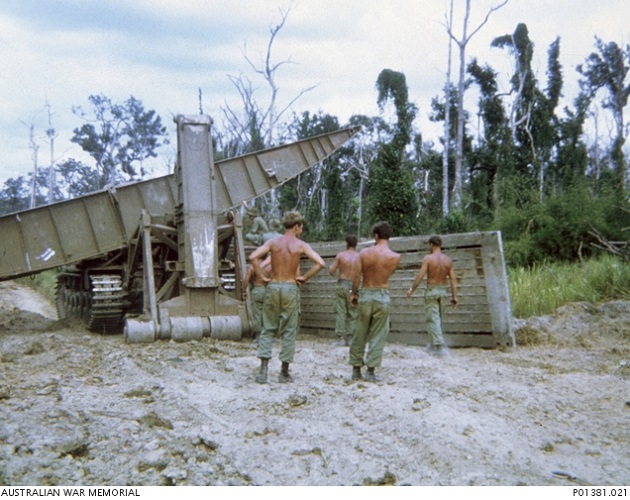
This is the front view of the Centurion with the mine clearing sled. On 11 April 1968 during Operation Cooktown Orchid, this device was tested in a mine clearing operation. Due to damage to the tank and the mine clearing sled, the operation ended the same day and the device was abandoned.
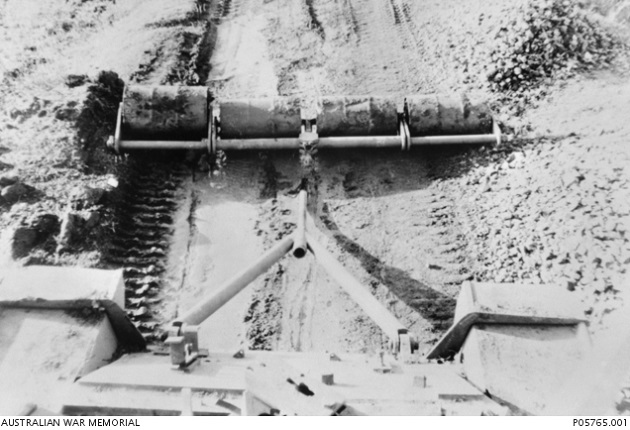
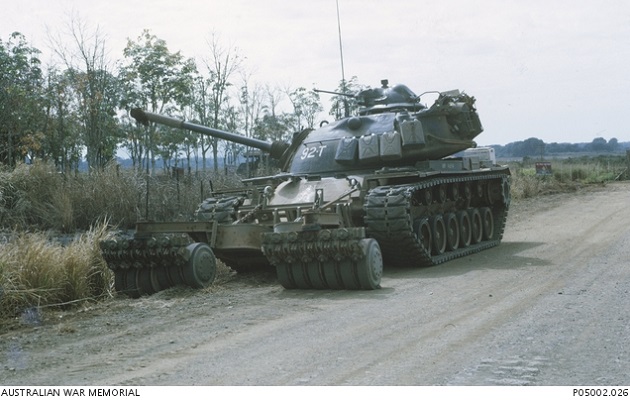
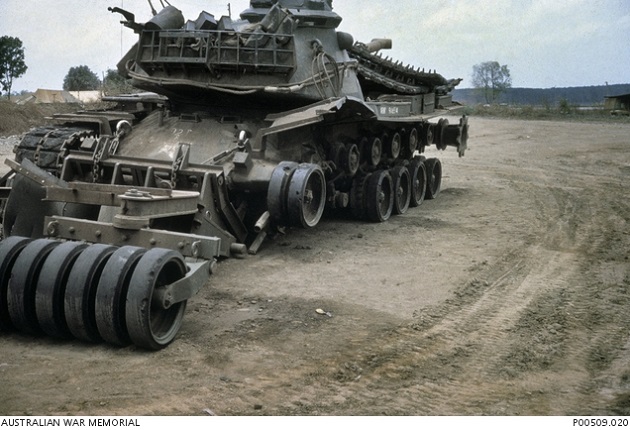
This is another failed attempt at mine clearance. Pushed by a Centurion at low speed, this mine roller device consisted of four 55 Gallon (208 Liter) cement filled drums attached by a central yoke to the tank’s forward towing eyes.
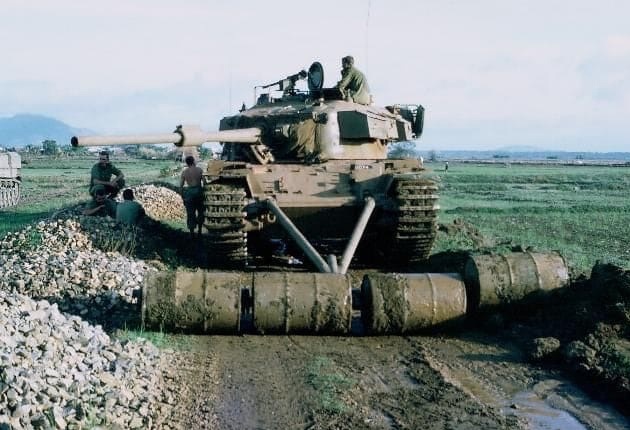
This is the view of the device from the front hull of the Centurion. In June 1969, it was tested around the Long Hai hills during Operation Thunderbolt.
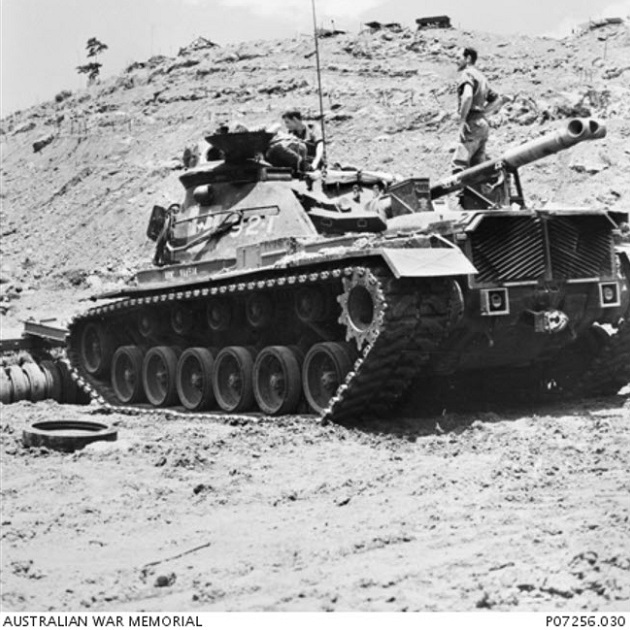
In September 1970, troopers of 1st Field Squadron, RAE, make final adjustments to a mine roller. The tank, a US M48A3 Patton tank, and the mine rollers were on extended loan from the US Army. After the device was fully tested at Nui Dat, it was put into operations in the Phuoc Tuy Province to clear roads and tracks were possibly mined by the enemy.
The M48A3 tank with mine clearing roller parked on the roadside somewhere in the Phuoc Tuy Province. The tank was usually crewed with three Australian sappers from 1 Field Squadron. Note the call sign 92.T (Nine Two Tango) painted on the side of the turret and the white star covered with dust on the front hull.
In late 1970, M48A3 tank 92.T was damaged by a mine during a mine clearing operation which wounded the crew. The blast had broken the left track and blown off the first two road wheels. It probably was a command detonated mine.
The damage from the mine blast was repaired and M48A3 tank 92.T was put back into operation.
This is my close up of the photo above. A white kangaroo was stenciled on the turret and was also named “SEPTIC” in reference to its former owners (septic tank or seppo is the Australian Rhyming slang for “yank”, slang for American). Note the soda or beer cans on the front left fender.
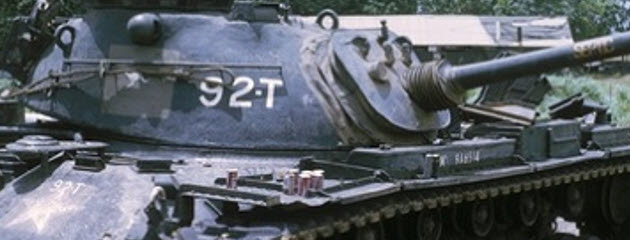
M48A3 tank 92.T was part of the task force occupying Courtenay Hill in 1971. It was used to sweep for mines along the approach roads surrounding the hill.
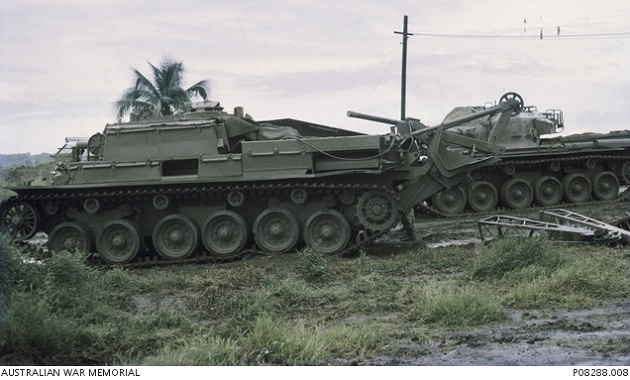
Centurion ARV
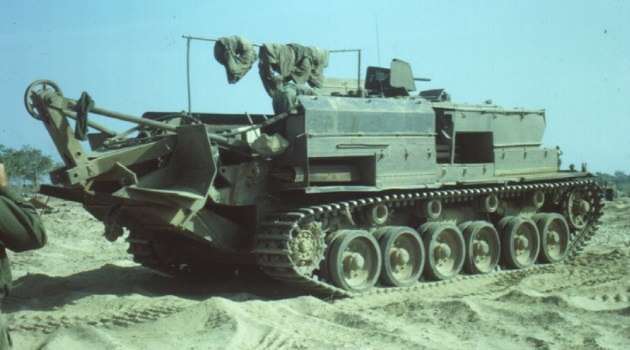
The Centurion Mk 2 Armoured Recovery Vehicle consisted of a basic tank hull with a box-like superstructure in place of the turret. This accommodated the winch and a separate winch engine, a 160 hp Rolls-Royce B80. The winch engine powered a generator providing electric power to the winch. The cable emerged from the back of the winch housing and a rear mounted spade gave stability whilst winching. Some Mk 2’s used the hulls of former gun tanks or tugs but most were newly built as ARVs.
A Centurion ARV at FSB Julia in 1968.
Centurion ARV, ARN 169113, with call sign 8D of A Squadron, returning from Operation Matilda, 1970.
M48A3 tank 92.T with mine damage being towed by a Centurion ARV back to Nui Dat.
A Centurion ARV in the foreground with a Centurion gun tank in the background.
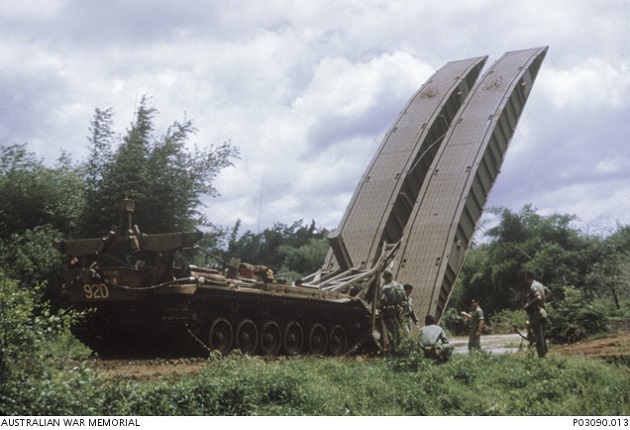
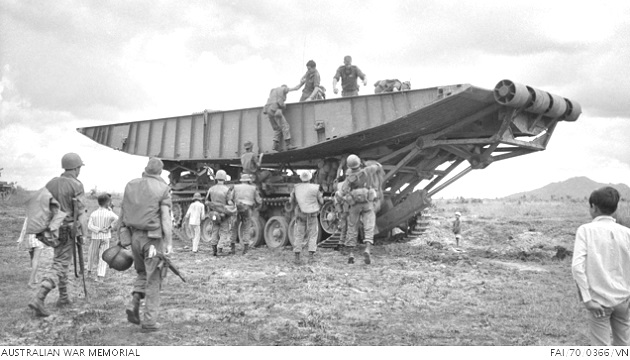
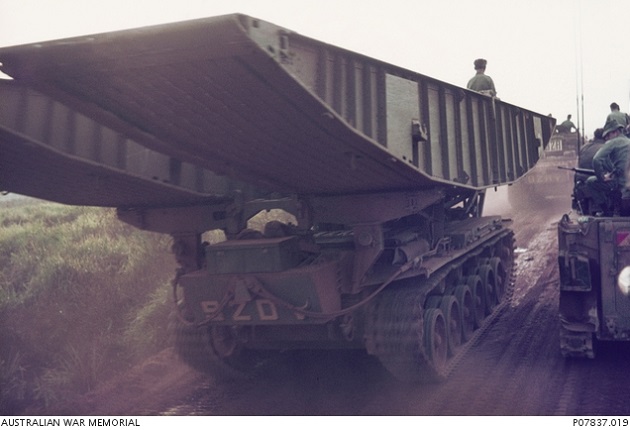
Centurion Bridge Layers
The Centurion Armored Vehicle Launched Bridge (AVLB) was produced by the Royal Ordnance Factory in Leeds, UK from 1960 to 1963 and came into service with the British Army in 1964. Based on the Centurion Mk5 tank chassis, this mobile assault bridge replaced the Churchill Bridge layer designed and used during WWII. The aluminum alloy bridge had a span of 13.72 meters (45 feet), and could be deployed in under two minutes.
A Centurion bridge layer with call sign 92D is laying a bridge span over a watercourse in Phuoc Tuy Province, 1968.
A Centurion bridge layer, believed to be call sign 92B, was damaged while returning from FSB Picton, in the north of Phuoc Tuy Province in 1969.
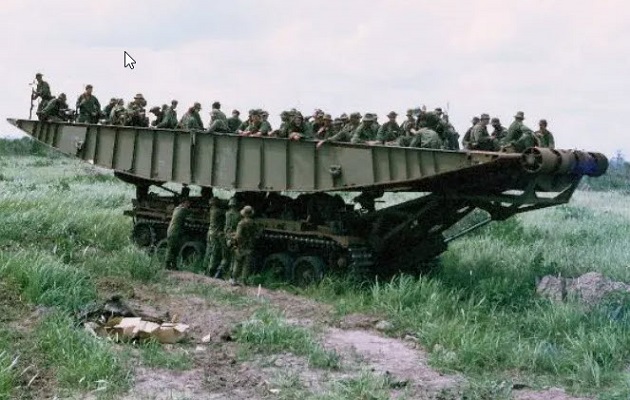
In June 1970, Vietnamese civilians watch Australian troopers climb aboard a Centurion Bridge Layer for a ride into an operational area.
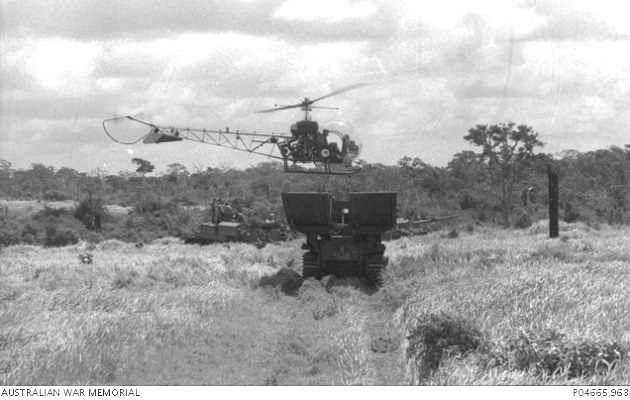
On 29 August 1970, a Bell OH-13 Sioux (“Possum”) helicopter of the 161 (Independent) Reconnaissance Flight is about to land on a Centurion Bridge Layer during Operation Massey Harris.
A Centurion bridge layer with call sign 920 (or 92D) in a convoy with M113A1 APCs of the 3 Cavalry Regiment, 1970-71.
It was said that a Centurion Bridge Layer is able to carry the whole squadron. It is true but only the crewmen, not all the tanks.
Atomic Tank
In December 1951, Centurion Mk.3, ARN 169041, was manufactured at the Royal Ordnance Factory, Barnbow, UK. It was assigned the British registration “06 BA 16”, the Centurion was supplied to the Australian Commonwealth Government and arrived in Australia in late May 1952. In July 1953, the Centurion was relocated to Woomera, in South Australia, where it was intended to be used in a secret test, code named Operation Totem. That was one of British atomic tests carried out in remote areas of Australia. While old and outdated military equipment had previously been used in nuclear tests, the Centurion was an advanced front line tank at the time. At Woomera, the Centurion was stowed with a complete issue of ammunition, including grenades and 2-inch smoke bombs.
The test site, Emu field, was so remote that getting the tank itself to the test site was a huge logistical challenge. The Centurion had to be transported across 300 miles (482.8 km) of rough desert tracks and sand dunes to Emu Field. By early August, the Centurion was in position at the test site, and over the next two months was subjected to various inspections and measurements. It was also fitted with sensors and makeshift crewmen mannequins. Positioned to face the low-yield atomic blast head on, Centurion 169041 was less than 500 yards (457.2 m) from the epicenter. Before the test, the Centurion’s engine was started, and other preparations were made to make it as close to a functional battlefield tank as possible.
The explosion of about 9 kilotons seared the desert on 15 October 1953 at 0700 hours local time. Despite the relative proximity to the point of the explosion, the Centurion was not destroyed, although damaged. The shock wave pushed it back 1.5 meters (4.9 feet). Since the hatches were not locked from the inside, they ripped open by the force of the blast, injuring some internal parts and mannequins. Under the influence of light radiation and a shock wave carrying tons of sand abrasive, clouded all the glass in the vision devices. The canvas gun cover mask was burnt off. The side skirts were ripped off and thrown 59 meters (180 feet) away. Also damaged was the roof of the engine compartment. However, examination of the tank revealed that the engine is not much affected. Despite the extreme pressure differences and the effects of electromagnetic pulse, the engine continued to run, and stalled only once it ran out of fuel.
Three days after the test, a crew, having the minimum required renovations, took their places in the tank and drove it out of the test blast area. However, the blast managed to leave sand in the engine and it soon jammed. The centurion was evacuated on a trailer which was hauling two tractors. Note the “Radioactive Material” sign on the side of the turret.
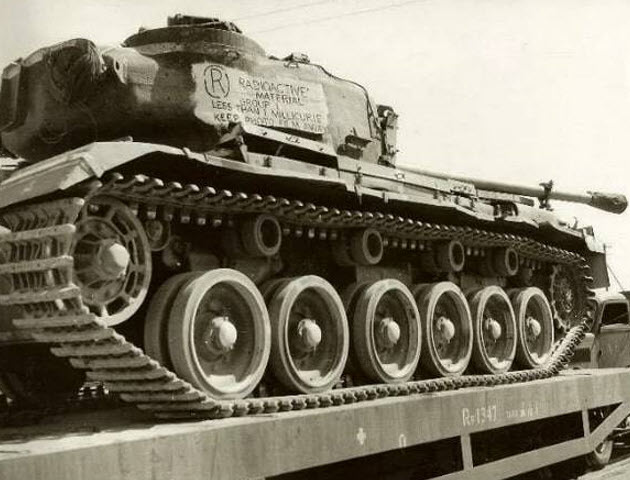
All who were involved in the evacuation of the Centurion did no use any protection, although the test tower had signs about the dangers of radiation. Subsequently, 12 of 16 military personnel who made contact with the Centurion 169041 after the blast, died from cancer.
After the Centurion was delivered to Woomera, it was subjected to decontamination and placed in storage area. In 1956, the radiation in the armour had decreased to a safe level. After the dosimetric survey, the Centurion was sent to the Puckapunyal tank range located in the Southeast Australia, 10 km (6.2 miles) west of Seymour. The damaged engine, clouded vision devices and defective sight were replaced. As such, the “atomic tank” operated as a tractor, and two years later was sent for overhaul. During the renovation and modernization, the tank was brought to the level of the Centurion Mk.5/1, armed a with 20 pounder gun. From 1959 to 1962, Centurion 169041 was stored, after which was transferred to the training center of the 1st Armored Regiment.
In September 1968, Centurion 169041 arrived in South Vietnam and was assigned to 4 Troop of C Squadron. It was initially the Troop Corporal’s tank with the call sign 34B. In May 1969 during a fierce firefight, Centurion 169041 (with B Squadron and call sign 24C) was hit by an RPG. The turret crew were all wounded by shrapnel as the RPG entered the lower left side of the fighting compartment, traveled diagonally across the floor and lodged in the rear right corner. Trooper R. Carter, was medevaced while the others remained. Nothing vital was hit and the tank remained battle worthy. By the end of 1969, Centurion 169041 had covered nearly 2500 miles (4023 km) on operations, and was ready for yet another rebuild. In January 1970, it was replaced in the squadron and Centurion 169041 spent its final days in South Vietnam with the 2nd Advanced Ordnance Depot at Vung Tau while awaiting space on a transport ship. In April 1970, Centurion 169041 left Vietnam and was sent to Bandiana, Australia, for its third overhaul which was completed in late 1970. After a few years in storage, the tank was again issued to 1st Armoured Regiment in Australia.
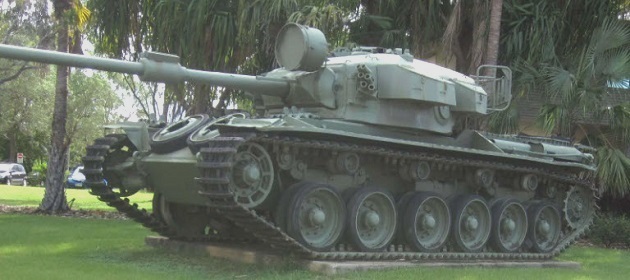
Centurion 169041 is the only tank known to have withstood a atomic blast and 15 years later was deployed in combat. Most sources state that it is located at the Robertson Barracks in Palmerston, Northern Territory, but it is said to be currently at Chauvel Lines at RAAF Base Edinburgh, South Australia.
Video: A Brief History of: The Atomic Tank
Today
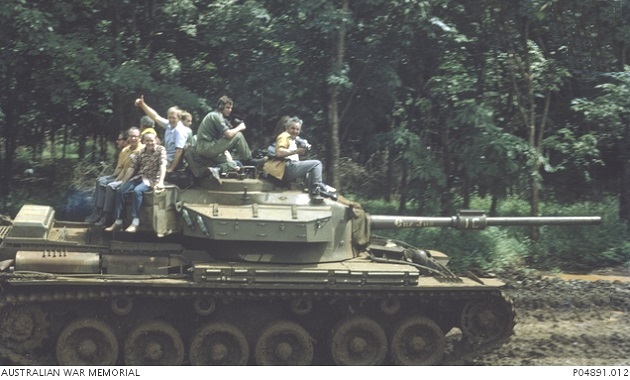
Video: Centurion Tank Ride
Video: Centurion Mk 5 Main Battle Tank
Video: Centurion Tank Drive
Model Kits and Decals
1/35:
AFV Club AF35100 Centurion Mk 5/1 RAAC (Vietnam) – 2006
AFV Club AF35291 M113A1 APC with T50 Turret, Vietnam War – 2019
Accurate Armour K082AU AASVN Centurion ARV Mk-2 – 1999
Star Decals 35-C1298 Australian Centurion Mk 5s in Vietnam – 2021
Star Decals 35-C1319 Australia in Vietnam # 4 Aussie M113A1 with T50 turret – 2021
Mouse House Enterprises MAD615 Australian Centurions – 4 Troop 1969 Decals
Mouse House Enterprises MAD602 Australian Centurions in Vietnam 1968-1970 Decals
Mouse House Enterprises MAD603 Australian Centurions in Vietnam 1971 Decals
1/56:
Rubicon Models 280105 Main Battle Tank Centurion Mk5 / MK5/1 – 2021
1/72:
Vespid Models VS720007 Centurion Tank Mk 5/1 RAAC (Vietnam) – 2022
Vespid Models VS720007S Centurion Tank Mk 5/1 RAAC (Vietnam) Deluxe edition – 2022
ACE 72428 Long Range Centurions Mk.5LR/Mk.5/1 with external fuel tanks – 2016
S-Model (China) SP072002 Limited Edition M113A1 with T-50 turret – 2018
Star Decals 72-A1075 Australia Centurion Mk 5. in Vietnam – 2021
Mouse House Enterprises MAD7201 Australian Centurions in Vietnam Decalset


I’m in need for photos of a Centurion Mk. 5 from C squadron of the 1st Armored Regt. Call sign 3C “Pussy Eater” Does anyone know where I can find photos of this tank? Thanks
LikeLike
Hello. This sentence may be unclear because it was translated from Japanese to English via machine translation.
I love the success of this Centurion tank in Vietnam, but I feel that there are few documents about the Centurion tank for its success and adoption examples. If possible, it would be very helpful if you could make a special feature on the Centurion tank. Also, would it be possible to find out the details of the Centurion tank’s spotting machine gun, such as the type of ammunition it may have used? I’m sorry for my ignorance, but it would be helpful if you could feature it.
LikeLike
Hi, you have a picture of a US M48 tank that was damaged by a mine. It was being used by the RAE as a mine sweeper at the time. This happened around June/July 1971 NOT 1970 as you’ve recorded. You might want to alter thus
LikeLike
Suggestion herewith … (not many more words, but a much more complete explanation).
“Operation Hermit Park was an assault on an enemy bunker system undertaken by C Squadron, commanded by Major Peter Bourke. The attacking force, comprising SHQ, two troops of tanks, an APC troop and 1 Platoon, V6 Company (4RAR/NZ), crossed the start line at 2.45pm.
They had not gone far when a drum became caught in the tracks of one of the tanks. Crystals were scattered everywhere, causing the eyes of the tank crew and nearby infantry to sting and water profusely. It was probably tear-gas.
Unfortunately, the enemy position was not where it had been reported and the assault continued for over an hour. All surprise was now lost and the enemy had time to consolidate their defences. At this point, one of the tank drivers was injured by branch which fell from a large tree. He was quickly replaced, but soon after the forward left Centurion was hit by an RPG. It struck the top of the turret just in front of the cupola, and, with the turret hatches open, both the commander and operator were wounded. Once the casualties were evacuated, the attack continued … another tank was hit, wounding the ‘new’ driver. The frontage was saturated with fire, with the surrounding vegetation above knee height being totally shredded. Despite this, a third tank was hit by an RPG. Although the RPGs had damaged the barrels of both tanks, they continued firing. Finally, the position was dominated and the enemy withdrew (towards the attackers to avoid artillery cut-off fire). It was 7pm by the time the tanks rebombed with ammo. They had fired sixty canister, four HE, two APCBC, 11,000 .30cal and 800 rounds of .50cal..”
LikeLike
In relation to the following quote “A total of 58 Centurion tanks had served in Vietnam where 42 had suffered battle damage, of which six were beyond repair, while only two crewmen had been killed in action”…. I suggest that it is inappropriate to refer to “only” two crewmen killed and the text should be replaced by ‘two crewmen were killed and many wounded’.
While the impact of the loss of loved ones is something that most people can understand, dealing with lifelong anguish of permanent disabilities should never be underestimated.
LikeLike
“A quandary. It is sometimes said that the perfect is the enemy of the good. There is enormous work involved in putting the above presentation together and this must be acknowledged. Errors detract, however. For example, the account of Op Overlord states that “The infantry assault pushed through an enemy bunker system with the Centurion tanks in close support crushing many bunkers and their occupants with their tracks.” Initially a tank troop assaulted without infantry support; a second tank troop joined it, infantry caught up and supported the subsequent capture of the position; the bunkers were too strongly built for the tanks to collapse.
I suggest that the following reference be incorporated in the blog for those interested in operational details: ‘Canister! On! FIRE!: Australian Tank Operations in Vietnam’, Bruce Cameron, Big Sky Publishing (2012). E-books are available from the publisher.”
LikeLike
I’m having trouble with ‘62 miles’ (Operation Pinnaroo) to get tanks from Nui Dat to the Long Hai Hills. I was only the gunner-sig. but that distance seems overstated.
LikeLike